Understanding the Anatomy of a Complex Knitting Pattern
To read complex knitting patterns, you must understand their fundamental structure. A pattern contains all information needed to recreate a finished garment, from cast on to bind off: a materials section (yarn weight, needle size, notions), schematic with finished measurements, abbreviations and symbols, written instructions organized by section, and knitting charts for stitch-heavy sections.
Understanding each component before you begin prevents confusion mid-project. The materials section specifies yarn weight, yardage, needle size, and gauge, critical because gauge determines whether your finished piece matches intended dimensions. A schematic provides finished measurements for different sizes, helping you select the right fit.
The abbreviations section lists every shorthand used in the pattern. Common abbreviations include k (knit), p (purl), k2tog (knit two together), ssk (slip, slip, knit), and yo (yarn over).
How to Read Knitting Charts Like a Professional
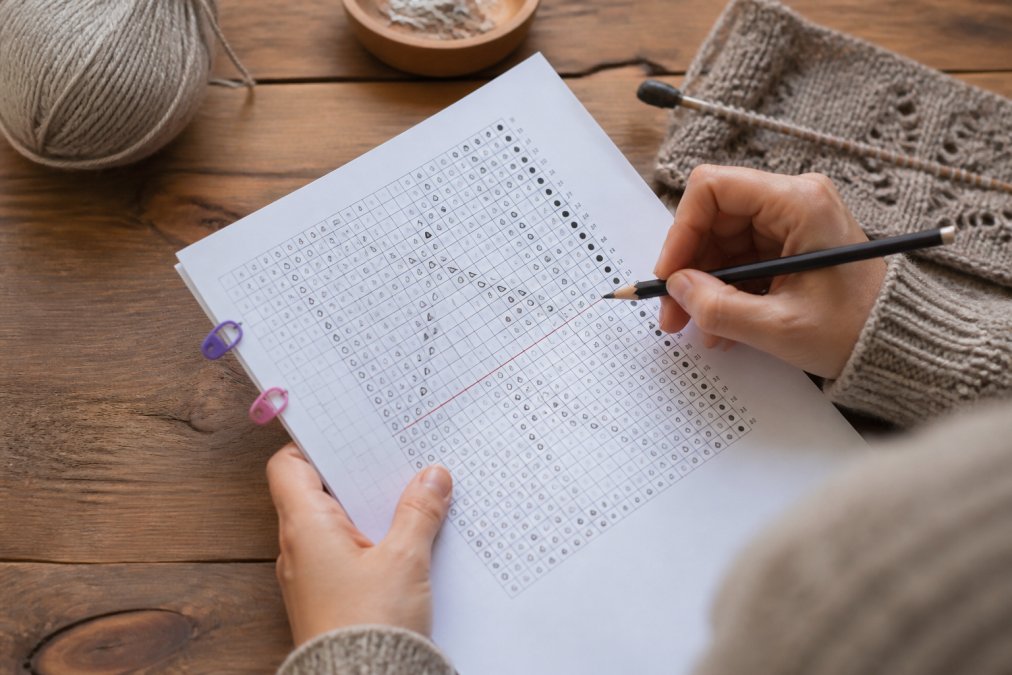
Knitting charts translate written instructions into visual grids, with each square representing one stitch and each row representing one row of knitting. Charts are essential for colorwork, lace, and cable patterns. Learning to read them starts with understanding the legend or key that accompanies every chart.
Close-up of hands holding a printed knitting chart with stitch markers and a pencil marking progress on a lace pattern, with yarn and needles nearby on a wooden table
Decoding stitch symbols and legend keys
Each symbol represents a specific stitch or action. A blank square typically means knit on the right side, purl on the wrong side. A dot represents a purl stitch. An X indicates a knit stitch on the wrong side. More complex symbols represent decreases (triangles or diagonal lines), yarn overs (circles), and cable crosses (twisted lines).
Spend time studying the legend before starting, this eliminates most chart-reading confusion. If a symbol appears in the chart but not in the legend, consult pattern notes or contact the designer.
Following row-by-row instructions from charts
Charts are read from bottom to top, with the bottom row representing your cast-on edge. Most charts are read right to left on wrong-side rows and left to right on right-side rows when working flat; when working in the round, all rows read right to left.
Track your position carefully using a row counter, pencil, highlighter, or chart keeper. Staying organized prevents dropped stitches and rework.
Knitting Pattern Abbreviations List and What They Mean
Abbreviations are the shorthand language of knitting patterns. Understanding the most common abbreviations eliminates constant glossary lookups.
Basic abbreviations include k (knit), p (purl), k2tog (knit two together, a right-leaning decrease), ssk (slip, slip, knit, a left-leaning decrease), and yo (yarn over, an increase that creates a hole). Shaping abbreviations like inc (increase), dec (decrease), and m1 (make one) appear frequently in garment patterns. Cable abbreviations include c4f (cable four front) and c4b (cable four back).
Familiarizing yourself with these abbreviations before starting prevents constant pattern lookups. Keep a printed abbreviations list nearby while working.
Understanding asterisks, parentheses, and repeats
Asterisks mark sections that repeat. For example, "k2, p2; repeat from * to end" means knit two stitches, purl two stitches, then repeat that pattern until the end of the row.
Parentheses indicate sizing information or optional instructions for specific sizes. Some patterns use brackets for the same purpose; always check the pattern's key for clarification.
Multi-size patterns present instructions for several finished garment sizes simultaneously, requiring careful attention to avoid mixing sizes. Instructions for each size appear in parentheses or brackets following the base instruction.
Bracketed sizing and how to track your size throughout
Bracketed sizing separates size-specific instructions. For example, "Cast on 80 [90, 100, 110] stitches" indicates 80 stitches for small, 90 for medium, 100 for large, and 110 for extra-large. Tracking your size throughout prevents costly mistakes.
Circle or highlight all instructions for your size before beginning. This visual system prevents accidentally working a different size midway through.
Working with Pattern Repeats and Row Counts
Pattern repeats create the rhythmic structure of knitted fabrics. A pattern repeat is a sequence of stitches or rows that repeats to fill the required width or height. The stitch count must be divisible by the repeat unit for the pattern to work correctly.
Tracking your position within a repeat prevents losing your place in complex stitch patterns. Many knitters use stitch markers to mark pattern repeats, making it easier to count stitches and identify where repeats begin and end.
Troubleshooting Common Pattern Errors and Mistakes
Even experienced knitters encounter pattern confusion or errors. The key to minimizing rework is identifying problems early and understanding whether the error originates in the pattern itself or in your execution.
Distinguishing between pattern errors and knitter errors
When something goes wrong, determine the source. A knitter error occurs when you misread an abbreviation, miscounted stitches, or skipped a row. A pattern error occurs when the pattern's instructions are mathematically inconsistent or contradictory.
Pattern errors are surprisingly common. Before blaming yourself, check the math: multiply stitch counts by pattern repeats, verify that decreases match increases, and confirm that row counts align with chart heights.
Work through the first few rows on scrap yarn to catch pattern errors early. If the pattern doesn't work, contact the designer or check Ravelry's pattern notes for documented errors and solutions.
Identifying knitter errors before they compound
Knitter errors compound quickly. The best defense is frequent checking.
After completing each pattern section, count your stitches to match the pattern's specified count.
Using lifelines to recover from mistakes
A lifeline is a length of yarn threaded through stitches at regular intervals (typically every 10-20 rows in lace, every 5-10 rows in colorwork). If you discover an error, unravel to the lifeline without losing stitches, then pick up from that point. This technique is essential for lace patterns.
Addressing tension inconsistencies
If your gauge swatch shows correct tension but your finished piece doesn't match the schematic, tension inconsistency is likely the culprit.
Decoding unclear or contradictory instructions
When instructions are unclear, check the pattern notes section, which often clarifies terminology specific to that designer.
Essential Tools and Resources for Pattern Navigation
Successful pattern reading requires both physical and digital tools tailored to pattern complexity. The right setup depends on whether you're working from print or screen, and how many pages or sizes your pattern contains.
Physical tools for printed patterns
A printed pattern with margins for notes, a row counter, and stitch markers form the foundation. Chart keepers reduce eye strain and prevent misplaced stitches. Highlighters in multiple colors allow you to mark different size instructions. A clipboard or pattern board keeps pages flat and visible while your hands work.
Digital pattern tools and how to use them effectively
Digital patterns offer searchable text and zoomable charts, but only if you know how to navigate them. PDF readers like Adobe Acrobat or Preview allow you to bookmark key sections (materials, abbreviations, charts) for instant access. Many knitters create a custom bookmark structure: one for the pattern overview, one for their size's cast-on row, one for the chart legend, and one for finishing instructions.
Managing complex, multi-page patterns
For patterns longer than 10 pages or containing multiple charts, create a digital index. In a PDF, use the "Outline" or "Bookmarks" panel to link directly to each major section. For printed patterns, use sticky tabs to mark the cast-on row, each chart, shaping sections, and finishing instructions.
Reference resources for pattern mastery
Resources like The Complete Guide to Lace Knitting from Brae & Heather provide deep dives into pattern reading for specific techniques. For foundational knowledge, Knitting for Beginners offers step-by-step guidance on reading patterns from the ground up.
Knitting for Beginners: The Unbelievable Guide to Knitting with Pictures, Instructions, and Lessons! (Knitting, How to Knit, Knitting Patterns - Paperback
The Complete Guide to Lace Knitting: Your lace knitting master class - Paperback
Conclusion
The ability to read complex knitting patterns becomes intuitive with practice and the right approach. Breaking patterns into components, understanding the anatomy, learning abbreviations, mastering charts, and tracking multi-size instructions, transforms intimidating patterns into manageable projects. The key is preparation: spend time studying the pattern structure, legend, and special instructions before casting on.
Frequently Asked Questions
What are the most common abbreviations in knitting patterns?
The foundational abbreviations appear across nearly every pattern: k (knit), p (purl), k2tog (knit two together), ssk (slip, slip, knit), yarn over (yo), and bind off (BO). Cable patterns add C4F (cable 4 front) and C4B (cable 4 back). Lace work introduces psso (pass slipped stitch over) and various decrease methods. A knitting pattern abbreviations list specific to your project type will save time; reference guides like Vogue Knitting the Ultimate Knitting Book include comprehensive abbreviation sections organized by technique.
How do I track my progress in a multi-size knitting pattern?
Before casting on, highlight or circle your size throughout the entire pattern using a colored pencil. Multi-size knitting pattern instructions use bracketed numbers [like this] or parentheses to separate sizes. Mark your stitch count at key shaping points and use stitch markers to track rows, especially in complex sections. Many knitters photograph each completed section and note the row number. Digital tools or a simple spreadsheet tracking cast-on stitches, increases, decreases, and bind-off counts prevent mid-project confusion about which size instructions you're following.
What should I do if I make a mistake in a complex knitting pattern?
Identify where the error occurred by counting stitches and comparing to your stitch count at that row. For small mistakes one or two rows back, you can drop the stitch and ladder it back up using a crochet hook. For larger errors or mistakes deep in the pattern, consider using a lifeline (a contrasting yarn threaded through all stitches at a safe point) so you can frog back without losing stitches. Always swatch first to test gauge and practice any unfamiliar abbreviations or techniques; this catches pattern interpretation errors before investing hours in the full project.
How do I read knitting charts for complex techniques like lace and cables?
Knitting charts use symbols to represent stitches, with a legend or key explaining each one. Read charts from bottom to top, right to left on right-side rows and left to right on wrong-side rows. Lace charts show yarn overs and decreases positioned to create openwork; cable charts display crossing stitches with symbols indicating cable direction. The Complete Guide to Lace Knitting covers chart reading for lace in depth, including how to modify charts for different sizes and how to create your own. Highlight or mark each completed row to avoid losing your place in intricate patterns.




0 comentarios