Why Complex Cables Intimidate Knitters (And Why They Shouldn't)
Complex cables don't require superhuman skills, they require a system. Cables are simply stitches crossed in a deliberate order. Once a knitter understands the crossing mechanism and develops a tracking method, even intricate multi-row patterns become manageable.
Intimidation usually stems from two places: cables look visually complex on paper with scattered symbols and crossing instructions, and many knitters lack a reliable way to track progress through repeating pattern rows, causing them to lose their place. Neither problem requires advanced skill; both require better tools and clearer mental models.
At Brae & Heather, we work with knitters tackling everything from simple two-over-two cables to elaborate honeycomb and braided patterns. The difference between success and frustration isn't talent, it's preparation. Knitters who invest time in understanding cable chart symbols, selecting appropriate tools, and establishing a tracking system complete projects that others abandon.
This guide walks through exactly how to knit complex cables easily, from choosing the right cable needle to fixing mistakes mid-pattern.
Essential Tools for Knitting Complex Cables
The right tools make cables possible. A poorly chosen cable needle creates tension problems, slows work, and increases dropped-stitch risk. Supporting tools like row counters and stitch markers prevent the tracking errors that derail projects.
Choosing the Right Cable Needle
A cable needle is a short needle designed to hold stitches temporarily while other stitches are worked. The best cable needle for complex patterns matches or stays slightly smaller than the working needles, has a slight curve or texture to prevent stitches from sliding off, and feels comfortable to manipulate repeatedly.
Straight cable needles work for simple cables but create problems in complex patterns. Curved cable needles, sometimes called "hook" needles, grip stitches more securely and allow faster stitch manipulation (peer-reviewed research). Cable needle size matters: if significantly larger than the working needles, it creates loose tension in the crossed stitches; if smaller, it becomes difficult to work stitches off it. Ideally, the cable needle should match the working needle size or be one size smaller.
Supporting Tools That Make a Difference
Row counters transform cable knitting from guesswork to precision. A simple row counter clipped to the knitting tracks which row of the pattern repeat the knitter is on, eliminating the most common source of error: losing track of position within a multi-row repeat.
Stitch markers serve a different function in cable work. Placing markers at the beginning and end of each cable repeat helps knitters identify where one pattern unit ends and another begins, especially valuable in patterns with multiple cable crossings across a single row.
A printed or enlarged cable chart kept beside the knitting prevents constant toggling between phone screens or book pages that breaks focus. Many knitters find that enlarging the chart to 150% or 200% makes symbols easier to read and reduces eye strain (the NIH).
The Step-by-Step Cable Crossing Technique
Cable crossings are the foundation of all cable knitting. A cable crossing works by temporarily moving stitches out of sequence, working other stitches, then returning to the held stitches. This simple principle, repeated in different configurations, creates every cable pattern.
Cable Front vs. Cable Back
Cable front and cable back describe the direction of the cross and determine whether the cable twists left or right.
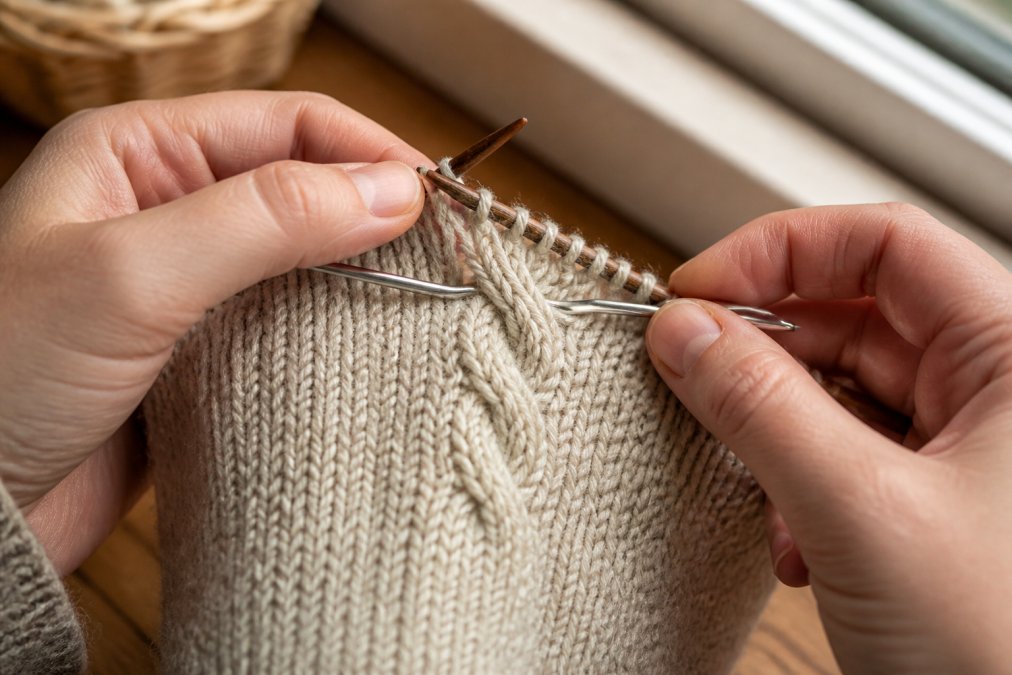
A cable front (abbreviated as CF or C4F for a four-stitch cable) means: slip stitches to the cable needle and hold them to the front of the work, knit the next stitches from the left needle, then knit the stitches from the cable needle. The held stitches end up on top of the newly worked stitches, creating a left-leaning cable twist.
A cable back (CB or C4B) reverses the process: slip stitches to the cable needle and hold them to the back of the work, knit the next stitches from the left needle, then knit the stitches from the cable needle. The held stitches sit behind the newly worked stitches, creating a right-leaning cable twist.
In complex patterns, alternating cable front and cable back creates braided effects or diamond patterns. Mixing them incorrectly produces a pattern that looks flat or misaligned.
Close-up of knitter's hands performing a cable cross with a cable needle, showing stitches being held to the front while working the cable crossing over stockinette stitch fabric with natural window lighting
Working Stitches Out of Order
The core skill in cable knitting is working stitches out of order. In regular stockinette stitch, knitters work every stitch in sequence from left to right. In cables, knitters deliberately skip stitches, work other stitches, then return to the skipped stitches.
When the pattern calls for a cable cross, the knitter slips the designated number of stitches onto the cable needle (without working them), holds the cable needle in the specified position (front or back), works the next group of stitches from the left needle, then works the stitches from the cable needle. Establishing a rhythm prevents mistakes: pause before the cable crossing, double-check the stitch count, execute the crossing, then resume normal knitting.
Practicing cable crossings on a swatch before starting a full project builds confidence and reveals the rhythm needed to prevent dropped stitches.
Reading Cable Knitting Charts and Symbols
Cable charts use symbols instead of words. Once a knitter learns the symbol language, charts become precise instructions that prevent ambiguity.
Understanding Chart Notation
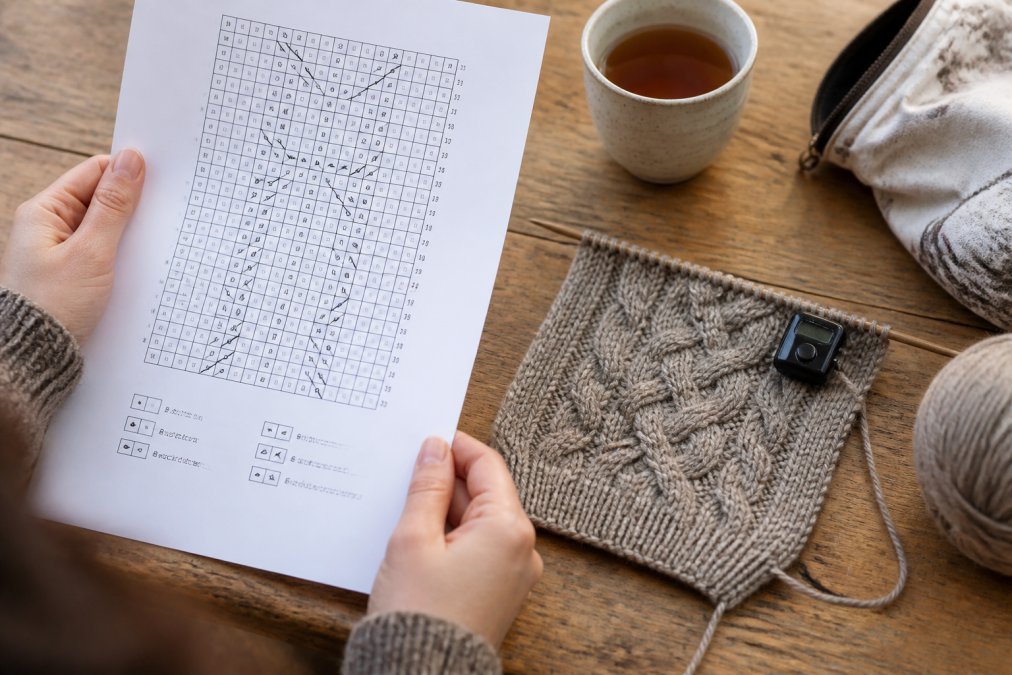
Cable charts use a grid where each square represents one stitch and each row represents one row of knitting. A small X or knit symbol means knit that stitch. A horizontal line or purl symbol means purl that stitch. A cable symbol, usually a diagonal line or small graphic showing crossed stitches, indicates a cable crossing and specifies direction: a line slanting left indicates a left-leaning cable (cable front); a line slanting right indicates a right-leaning cable (cable back).
The chart is read from bottom to top, with the bottom row representing the first row worked. Within each row, the chart is read from right to left (the direction stitches are worked on flat knitting). Cable charts include a legend that specifies the exact stitch count for each cable crossing (C4F means cable 4 front: slip 2 stitches, knit 2, knit 2 from cable needle). Consulting the legend before starting prevents misinterpretation.
Knitter's hands holding a printed cable knitting chart next to an in-progress cable knit swatch on needles, with a row counter clipped to the work and a cup of tea nearby on a wooden table
Tracking Progress in Pattern Repeats
Complex cables repeat the same pattern sequence over multiple rows. Losing track of position within the repeat is the most common reason knitters abandon cable projects.
A row counter eliminates this problem by creating a visible record of progress. Some knitters prefer writing row numbers on the printed chart itself, checking off each completed row. For patterns with multiple cable panels across a garment, marking each panel separately prevents confusion and working the wrong row in the wrong panel.
How to Fix Cable Knitting Mistakes
Mistakes in cables are fixable, though the fix depends on the error type and how many rows back it occurred.
Fixing Dropped Stitches in Cables
A dropped stitch in a cable creates a ladder of loose loops running down the work. For a dropped stitch in stockinette surrounding a cable, use a crochet hook to pick up the dropped stitch and ladder it back up to the current row by catching each horizontal strand above it.
For a dropped stitch within the cable, the knitter may need to unravel back to the cable crossing row, re-execute the crossing correctly, and knit forward again. Prevention is more practical: securing stitches on the cable needle with a temporary stitch marker, small loop of yarn, or safety pin prevents them from sliding off during the crossing.
Correcting Twisted or Crossed Stitches
A twisted stitch in a cable creates a tight, distorted appearance, usually from working into the back of a stitch instead of the front. If the twisted stitch is in the current row, drop it and pick it up correctly. If it's several rows back, unraveling to that row and re-knitting forward is usually fastest.
A crossed stitch, where two stitches swap positions unintentionally, creates a visible disruption in the cable pattern. If discovered immediately, dropping and re-working the affected stitches corrects it. If discovered later, unraveling back and re-knitting forward is necessary.
Yarn Selection and Tension for Cable Definition
Cable definition depends on yarn choice and consistent tension. A yarn that's too stretchy or too thick obscures cable texture. A yarn that's too thin or inelastic makes cables look flat.
Yarn elasticity matters more in cables than in stockinette. A cable works by crossing stitches, creating density and texture. Yarn with good elasticity bounces back after being stretched and compressed by the crossing, maintaining the cable's visual definition. Natural fibers like wool hold cable shape better than synthetic alternatives (peer-reviewed research).
Yarn weight affects cable visibility. Thicker yarns create bolder cables; thinner yarns create more delicate cables requiring very precise stitch tension. Most cable patterns work best in fingering to worsted weight.
Tension consistency is non-negotiable in cables. Loose tension makes cables sloppy and undefined; tight tension makes cables hard to work and creates hand fatigue. Most knitters find that cables require slightly tighter tension than stockinette, but the difference should be subtle.
Practical Strategies for Tracking Complex Patterns
Tracking systems prevent the mental errors that derail complex cable projects. A printed chart with a ruler or magnetic board underneath keeps the knitter's place visible. As each row is completed, the knitter moves the ruler down one row, keeping the current row in clear view.
A row counter worn on a cord around the neck stays visible throughout the knitting session. Some knitters use two row counters: one for the overall row count and one for the pattern repeat position.
A written log on graph paper or a spreadsheet can track multiple cable panels simultaneously. For a sweater with three different cable sections, separate columns track each section's progress independently.
Checkpoint rows, plain stockinette rows between cable crossings, serve as visual anchors. Taking progress photos at regular intervals creates a visual record useful as a backup confirmation.
Breaking complex patterns into smaller segments makes them feel less overwhelming. Instead of thinking "I have to knit fifty rows of complex cables," a knitter can think "I need to complete three eight-row repeats, then move to the next section."
Complex cables reward preparation more than talent. Knitters who invest in understanding cable mechanics, selecting appropriate tools, and establishing tracking systems complete projects that intimidate others. The technique itself is straightforward: cross stitches deliberately, work them in a specific order, repeat according to a chart.
Brae & Heather's curated selection of knitting resources supports this journey. The Cozy Cables: Inspired Knitting Patterns to Warm the Body and Soul book provides expertly designed patterns with clear instructions, eliminating the ambiguity that creates errors. Start with a simple cable pattern, establish your tracking system, and build from there. The cables that seem impossible today become routine with deliberate practice.
Cozy Cables: Inspired Knitting Patterns to Warm the Body and Soul - Paperback
Frequently Asked Questions
What is the easiest way to knit cables for beginners?
Start with two-stitch cables before advancing to larger patterns. Master the cable front and cable back crosses using a cable needle, then practice on small projects like scarves or cowls. Use a printed chart with a row counter to track your place. The key is working stitches out of order consistently, once you understand that concept, all cables follow the same principle. Brae & Heather's Cozy Cables book breaks down each technique with clear instruction to build your confidence.
How do you keep track of complex cable repeats?
Use a combination of physical tools and mental systems. Place stitch markers at the beginning and end of each pattern repeat to establish clear boundaries. Use a row counter to track which row you're on within the repeat. Highlight your current row on a printed cable chart with a sticky note or highlighter. Some knitters photograph their chart and mark progress digitally. Breaking large patterns into smaller visual chunks prevents the psychology of overwhelm that makes complex cables feel impossible.
What tools are essential for knitting complex cables?
A quality cable needle that matches your working needle size prevents tension issues and dropped stitches. Stitch markers help you track pattern boundaries. A row counter keeps you oriented within repeats. Many experienced knitters prefer interchangeable needle systems like the addiClick Set ($240.00) for flexibility across different cable weights and gauges. Gauge swatches are essential, they ensure your cable definition and overall fit are correct before you commit yarn to a full project.
What's the difference between cable front and cable back?
Cable front (also called cable left) twists your stitches to the left side of the fabric, while cable back (cable right) twists them to the right. The direction depends on which stitches you place on your cable needle first and whether you work them before or after the stitches remaining on your main needle. Reading your cable chart tells you which to use for each cross. Mastering both creates the braided and honeycomb textures that make complex cables visually striking.




0 comentarios