
How to Block Wool Garments Properly
Publicado el Oct 06, 2026
By Editorial Team
Ahorra un 15% en toda la tienda desde ahora hasta el 31 de diciembre de 2025

Last Updated: October 6, 2026
Blocking is the process of shaping and setting block wool garments to their intended dimensions after washing. For wool garments especially, blocking transforms how a finished piece looks and feels.
Wool fiber has memory. When you knit, the yarn compresses under tension. Blocking relaxes those fibers and allows them to settle into their final shape. A sweater that feels stiff or uneven straight off the needles becomes soft and polished after blocking. Lace gains stitch definition. Cables show their texture clearly. Edges lie flat instead of curling.
This is where blocking separates amateur results from polished, professional-looking pieces. Many knitters skip this step, thinking their work is done at the bind-off. That's the biggest mistake in finishing. The difference between a blocked and unblocked garment is the difference between something you'll actually wear and something that sits in a drawer.
Brae & Heather has curated tools and resources specifically for this step because we understand that finishing matters as much as the knitting itself. Proper blocking sets the tone for how your work will be received and worn.
Blocking requires minimal equipment, but the right tools make the process easier and protect your fiber.
Essential blocking tools:
If you don't have blocking mats, alternatives work too. A clean towel laid flat on a bed, a yoga mat, or even a spare blanket can serve as a blocking surface. The key is having something you can pin into safely without damaging your furniture.
For mittens and small items, Mitten Boards - Handcrafted in the USA by TJS Designs from Brae & Heather offer a dedicated solution. Made from solid maple hardwood with a smooth surface, these boards are specifically designed to block and dry mittens while preserving their shape, proportions, and stitch definition. At $20.00, they're an investment in getting those small garments right.

Before you block, your garment must be clean and your ends woven in. Blocking doesn't fix loose ends or dirty yarn.
Weave in all ends first. Use a tapestry needle to thread each loose tail through stitches on the wrong side of the fabric. This takes time but prevents ends from unraveling during washing and blocking. Weave at least an inch of tail into the fabric to anchor it securely.
Wash your wool gently. Use cool water and a wool wash or mild soap. Avoid regular detergent, which can felt wool. Fill a basin with cool water, add soap, and submerge the garment. Let it soak for 10-15 minutes. Gently squeeze soapy water through the fabric without wringing or twisting. Drain, rinse with cool water until the water runs clear, then rinse one more time.
The washing process itself begins the relaxation of wool fiber. You're not just cleaning; you're preparing the fiber to accept blocking.
Remove excess water carefully. Squeeze gently. Lay the wet garment on a clean towel and roll the towel to absorb moisture. Press gently along the roll to release water. Don't wring the garment or let it hang while wet, which stretches it unevenly.
Once your garment is clean and damp, you're ready to block. The fiber is now receptive to shaping.
There are two main blocking methods for wool. Each has strengths depending on what you're blocking.
Wet blocking means pinning your damp garment to a mat and letting it air dry completely. This method works best for most projects. The moisture relaxes the fiber thoroughly, and the garment dries in the exact shape you've pinned it.
Wet blocking is gentler on delicate fibers. It's also foolproof, you can't accidentally damage the yarn with heat. For lace, cables, and complex colorwork, wet blocking gives you precise control over stitch definition and tension.
Steam blocking uses heat from a steam iron or kettle to relax the fiber. You hold the iron just above the pinned garment and let steam penetrate the wool without letting the iron touch the fabric directly. This method is faster and works well for items that need less aggressive shaping.
Steam blocking carries a small risk. If the iron touches the wool directly, it can flatten or damage the fiber. It's also not ideal for very delicate yarns or pieces with multiple colors, where heat can cause bleeding or uneven relaxation.
For most knitters, wet blocking is the safer, more reliable choice. It takes longer, typically 24-48 hours for a garment to dry completely, but the results are consistent. Steam blocking is useful when you're in a hurry or working with sturdy yarns that can handle heat.
The science behind both methods is the same: moisture and time allow wool fiber to relax and reset into a new shape. Wet blocking simply gives you more control and carries less risk.
Blocking is straightforward once you understand the mechanics. Your goal is to pin the garment to your mat in the shape you want it to dry in.
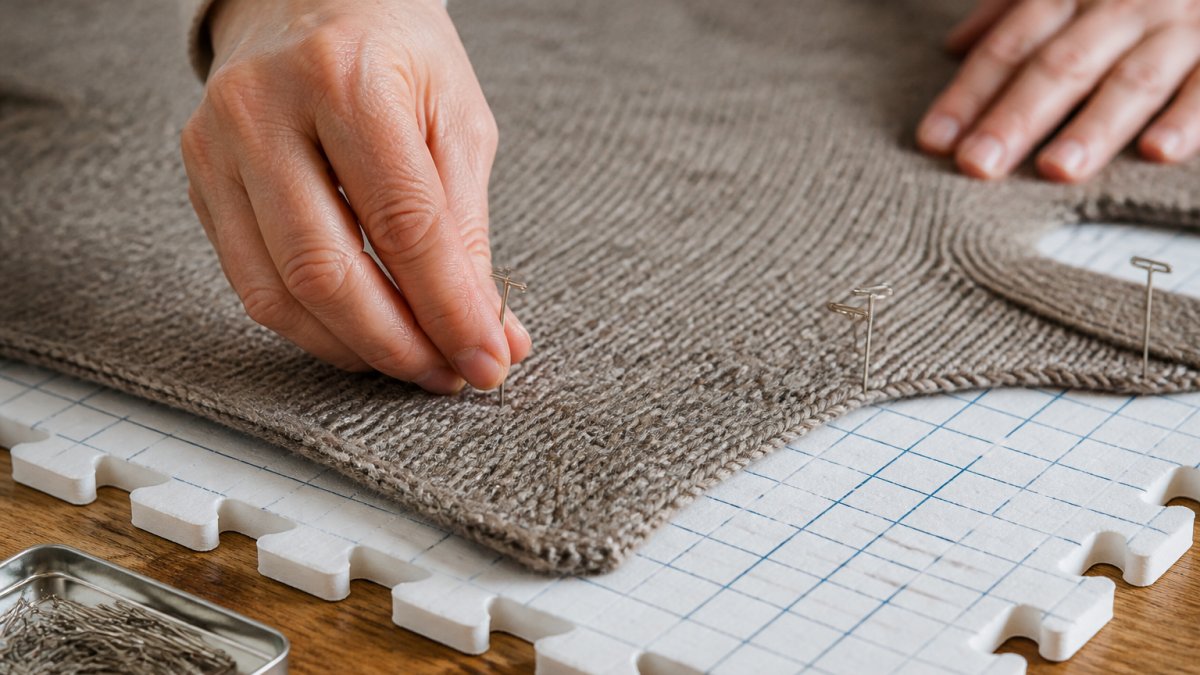
Lay out your blocking mat. If using interlocking foam tiles, connect them to create a surface large enough for your garment. Place the mat on a flat surface where it won't be disturbed for 24-48 hours.
Pin the garment to the mat. Start at one corner and work methodically. Pin the edges first, then fill in along the sides. Space pins every 2-3 inches along the perimeter. For a sweater body, you'll pin the sides, armholes, and neckline.
Check dimensions as you pin. Use your measuring tape to verify that the garment matches your pattern schematic. If the schematic calls for a 20-inch bust width, pin the garment to that width.
Use light tension. Don't pull so hard that you distort the stitches. The goal is to hold the garment in place, not to stretch it.
For edges and lace, use blocking wires. Thread a blocking wire through the edge stitches (not piercing the yarn, just threading through the stitch loops). Pin the wire ends to the mat. This keeps edges straight and prevents curling better than pins alone.
Once pinned, leave the garment undisturbed. Air circulation helps it dry faster, so a room with gentle airflow is ideal.
Drying time depends on humidity, air circulation, fiber weight, and garment size.
Mitten Boards – Handcrafted in the USA by TJS Designs →
A lightweight lace shawl might dry in 12-18 hours. A heavy wool sweater can take 48-72 hours or longer. Merino and other fine wools dry faster than chunky or densely spun yarns.
The rule of thumb: don't unpin until the garment is completely dry to the touch. If you unpin too early while there's still dampness inside the fibers, the garment will shift out of shape as the remaining moisture evaporates.
To check if it's dry, gently touch the center of the garment. It should feel dry and cool, not damp. Lace should feel crisp. Cable stitches should hold their texture.
In humid climates, drying takes longer. A fan pointed at (not directly on) the garment speeds the process without disturbing the shape. In dry climates, blocking can be surprisingly fast.
Temperature matters too. Room temperature drying is ideal. Avoid placing your blocking mat in direct sunlight or near heat sources, which can unevenly dry the garment and cause uneven fiber relaxation.
Different garment types require slightly different blocking approaches.
For sweaters and cardigans: Pin the body to schematic dimensions first. Then pin the sleeves, matching the armhole seam lines. Block sleeves to their specified length and cap height. This ensures sleeves fit correctly into armholes when you seam them.
For socks and mittens: Use mitten boards or a flat surface. Pin the cuff, foot, and heel to maintain proper proportions. Socks especially benefit from blocking because it sets the leg and foot length for a better fit.
For lace shawls and wraps: Pin the outer edge aggressively to open up the lace pattern. Use blocking wires along the edge to create a straight border. Lace blocking is where you see the most dramatic transformation, the stitch definition becomes stunning.
For hats: Pin the crown and brim to the intended dimensions. A hat that's slightly too loose will settle into a better fit after blocking.
For baby items: These dry quickly and are small enough to block on a towel. Pin gently to avoid distorting delicate stitches.
The principle stays the same across all garment types: pin to schematic dimensions and let the fiber relax into that shape.
Understanding what not to do is as important as knowing what to do.
Don't skip weaving in ends. Loose ends unravel during washing and blocking. You'll end up with a garment that starts to fall apart. Spend the extra time upfront.
Don't use water that's too hot. Hot water can felt wool, especially if combined with agitation (A review of the sustainable methods in imparting shrink resistance to wool fabrics).
Don't wring or twist the garment. This damages the fiber and creates permanent creases. Squeeze gently. Roll it in a towel to remove excess water.
Don't unpin before the garment is completely dry. Premature unpinning means the garment will shift and lose its shape. Check thoroughly before removing pins.
Don't block in direct sunlight or near heat. This causes uneven drying and can damage delicate fibers. Choose a quiet, shaded spot with gentle air circulation.
Don't forget to measure. Many knitters pin garments without checking dimensions. You end up with a sweater that's the right shape but the wrong size.
Don't use regular pins for blocking. They slip out of the mat, especially if you're working with delicate lace. T-pins have wider heads and hold much better.
Don't block synthetic blends the same way as natural fibers. Acrylic and acrylic blends don't respond to blocking the way wool does.
Blocking is a finishing step that demands attention to detail. The effort you put in here determines whether your finished garment looks handmade or professionally made.
Properly blocking block wool garments transforms your knitting from good to exceptional. The process is straightforward, wash, pin, and wait, but the results justify every step.
Brae & Heather offers the tools and resources you need to block with confidence.
Soak your wool garment for 15-30 minutes in cool water with wool wash. This allows the fiber to relax and absorb moisture evenly without shocking the fibers. The exact time depends on fiber type and garment weight, lace weight yarns need less time than heavier merino or cashmere. Check the yarn label for specific guidance, and avoid prolonged soaking which can weaken fiber integrity.
Wet blocking submerges the garment in cool water and pins it flat to dry, ideal for reshaping lace and opening stitch definition. Steam blocking uses direct heat from a steamer held above the damp garment, best for setting cables without full submersion. Wet blocking takes longer but offers more control over final dimensions; steam blocking works faster but risks direct heat damage on delicate natural fibers.
Most wool garments dry completely in 24-48 hours when left flat at room temperature. Heavier items like sweaters may need up to 72 hours. Ensure good air circulation and avoid direct sunlight or heat sources, which can cause uneven drying and shrinkage. Check garment dimensions occasionally during drying; some fibers settle faster than others depending on yarn weight.
Blocking reshapes wool temporarily through fiber relaxation, but the garment will gradually return toward its original dimensions over time as it's worn and washed. Proper blocking does set the intended gauge and stitch definition, which can appear as a permanent size change if done correctly. This is why blocking for gauge correction is valuable, it ensures your finished garment matches the pattern's intended proportions before wear.

0 comentarios