
How to Avoid Knitting Pattern Errors: A 2026 Guide
Publicado el Sep 16, 2026
By Editorial Team
Ahorra un 15% en toda la tienda desde ahora hasta el 31 de diciembre de 2025

Last Updated: September 16, 2026
Learning how to avoid knitting pattern errors starts with understanding why they happen: a collision between human attention, dense instructions, and the assumption that a printed pattern is always correct.
Knitters repeat the same errors because of how attention works during repetitive motion. Once the hands learn a rhythm, the brain shifts into a lighter monitoring mode, exactly when a row gets skipped or a decrease lands on the wrong side.
Knitting pattern errata are published corrections that fix mistakes in a pattern after release. Checking for them before casting on is the highest-return habit a knitter can build.
Start with the designer's own site or the publisher's pattern page. Many magazines maintain a corrections page indexed by issue. If a pattern was downloaded, check the file's version date; updated files often carry a revision note.
Learning how to read knitting charts is the difference between following a picture and guessing at symbols. A chart is a visual map of the fabric, read in the direction the knitting moves.
The symbol logic follows the fabric. A blank square usually means knit on the right side and purl on the wrong side. A dot does the reverse. Understanding why the symbols flip prevents the most common chart-reading error: knitting an entire wrong-side row as if it were a right-side row.
A gauge swatch is a small test square knit in the project's yarn and stitch pattern, then measured to confirm your tension matches the pattern's stated gauge. Skipping it is the most expensive shortcut in knitting.
Knitting project tracking tools keep a work in progress honest. A row counter, stitch markers, and a written or digital log turn a long pattern into verifiable checkpoints. The difference between a knitter who finishes a sweater and one who abandons it is usually not skill, but whether the work is organized into checkpoints that surface errors within a row or two.
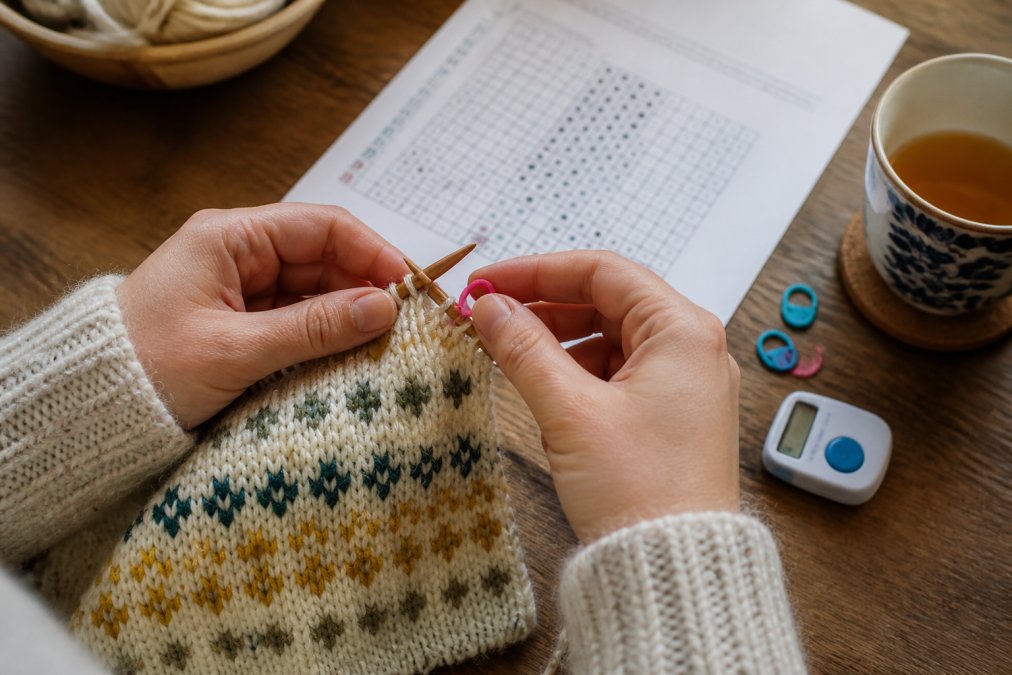
Most guides treat stitch markers, life lines, and row counters as separate tips. Used together as a workflow, they catch errors before they compound. A common pattern among experienced makers:
Thread a life line every ten to twenty rows on complex lace or cable work. If a mistake appears above it, the work can be ripped back to the life line and reknit without losing the project. On a lace shawl with a 24-row repeat, a life line at the end of each repeat means the worst-case recovery is one repeat, not the whole shawl.
Vogue Knitting the Ultimate Knitting →
Digital tools close a gap paper cannot: they remember what the knitter forgets. A row-counting app or physical click counter removes the mental arithmetic of tracking repeats, and several pattern-tracking apps let a knitter import a PDF, highlight the current row, and store notes per project.
A practical setup for a multi-project knitter:
A visual diagnostic habit means pausing every few rows to look at the fabric as a whole, not just the stitch under the needle. Most errors announce themselves visually before they become structural. The skill is learning to read what the fabric is telling you.
| What you see | Likely cause | Where to look |
|---|---|---|
| A loose, laddered column of horizontal bars | Dropped stitch | The column directly above the ladder; the stitch has fallen off the needle and is unravelling downward |
| An extra stitch that throws off the count | Accidental yarn over | The row where the count changed; a yarn over creates a small hole and one extra loop |
| A tight, crossed loop that disrupts the surface | Twisted stitch | The stitch was worked through the back loop unintentionally, or the needle entered the wrong leg |
| A hole where no hole belongs | Missed decrease, or a yarn over that should not be there | The row where the hole appears; check the pattern's decrease placement |
| A cable that leans the wrong way | Cable crossed in the wrong direction | The row where the cable was worked; left-leaning and right-leaning cables use opposite hold positions |
| Colorwork that looks jagged or gappy | Floats pulled too tight, or the wrong color carried | The transition row between colors; check float tension and color sequence |
| A section that is wider or narrower than the rest | Missed or extra increase/decrease | The first row where the width changed; count stitches against the pattern's expected count |
| A visible seam or ridge in the round | A row worked in the wrong direction, or a purl row where a knit row belonged | The row where the ridge appears; check whether the pattern called for a right-side or wrong-side row |
| Stitch pattern that drifts out of alignment | A skipped row in a chart repeat | The last row where the pattern aligned correctly; the error is in the rows since |
A diagnostic habit is only useful if it leads to a proportionate response. The index above answers two questions quickly: what went wrong, and how far back does it go.
Tinking is unknitting stitch by stitch, reversing the work one loop at a time. Frogging is ripping out entire rows or sections. Choosing between them comes down to how far back the error extends.
The same handful of mistakes account for most knitting pattern errors. Naming them makes them easier to intercept.
| Mistake | Why It Happens | The Fix |
|---|---|---|
| Skipping the gauge swatch | Feels like wasted time | Swatch, wash, and measure before starting |
| Ignoring errata | Assumes the pattern is correct | Search for corrections before casting on |
| Misreading chart direction | Wrong-side rows read the opposite way | Mark the right side and track direction |
| Losing the stitch count | Missed increase or decrease | Count stitches at every repeat boundary |
| No life line on complex work | Confidence outpaces caution | Thread a life line every 10-20 rows |
| Knitting while fatigued | Attention drops during repetition | Stop at the first sign of confusion |
Visit the pattern designer's website or Ravelry page and search for the pattern name plus 'errata.' Many designers post correction documents with date stamps. Check the publication date on your pattern copy against the latest errata update. If you bought a printed book, the publisher's website often hosts a corrections page. Cross-reference any listed corrections with your pattern before you cast on, and mark the changes directly on your copy so you don't forget them mid-project.
The most frequent errors involve stitch counts that don't add up after a decrease or increase row, missing yarn over instructions in lace patterns, and chart symbols that contradict the written directions. Gauge discrepancies between the suggested yarn and your substitute can also cause fit problems. Always verify that your stitch count matches the pattern's expected total at the end of each shaping section, and double-check that your yarn weight and needle size align with the pattern's recommendations.
Count your stitches against the pattern's stated total. If the numbers don't match, check whether you followed every increase, decrease, or yarn over. Then read the pattern section aloud row by row and trace each instruction against your knitting. If the math in the pattern itself doesn't work (for example, a decrease row that leaves the wrong stitch count), the error is likely in the pattern. Compare with other knitters' project notes on forums to confirm.
First, check the publisher's or designer's website for posted errata that may already address it. If no correction exists, document the issue clearly and contact the pattern designer or publisher directly. Many designers appreciate the notification and will issue an update. In the meantime, work out the correction yourself by adjusting stitch counts or re-charting the affected section, and note the fix on your pattern copy so you can reference it if you knit the design again.

0 comentarios