Step 1: Understand Aran Stitch Patterns Before You Cast On
Aran knitting is a style of sweater construction built from raised cable, honeycomb, and twist stitch panels worked on a purl background, traditionally knit in undyed wool. Learning how to knit an Aran sweater step by step starts here, because the stitch vocabulary determines yarn quantity, needle size, and how the panels fit together.
The three building blocks are:
Cable stitch: stitches crossed over one another using a cable needle, creating a rope-like column
Honeycomb stitch: interlocking cables that form a hexagonal, cell-like texture
Twist stitch: a two-stitch mini-cable worked without a cable needle, used for narrow accent lines
Brae & Heather designs Aran patterns around these panels, and the difference between a flat sweater and a crisp one comes down to how deliberately the panels are placed.
Pro TipWork each panel as an isolated swatch before committing to the full garment. A cable panel that looks balanced at 20 stitches can look cramped at 16, and you will not discover that until the body is half finished.
Step 2: Pick the Best Wool for Aran Sweaters and Match Your Yarn Weight
The best wool for Aran sweaters is a springy, all-natural fiber with enough loft to hold cable definition without sagging. Aran weight yarn typically knits at 16 to 18 stitches per 4 inches on 4.5mm to 5.5mm needles, though cable panels pull the fabric in.
Wool fiber matters more here than in almost any other garment. Cable stitches are heavy, and a yarn with poor memory will stretch at the shoulders and lose its texture. Look for yarns described as springy or lofty, and avoid anything with a slick, dense hand.
Brae & Heather's Atlantic 3-ply Aran 100% Wool Yarn is a natural fit for this project. For a softer, next-to-skin garment, Softspun Cream Undyed is a 25-micron worsted weight at 20 stitches per 4 inches on 4.5mm needles, with 240 yards per skein and enough loft to keep cables plump.
Atlantic 3-ply Aran 100% Wool Yarn
Softspun Cream Undyed
How Much Yarn for a Sweater: Sizing Your Skein Count
How much yarn for a sweater depends on garment size, cable density, and yarn put-up. Cable panels consume more yarn than stockinette because the crossed stitches shorten the row.
Garment Size
Approx. Yardage
Atlantic 3-ply Skeins (135 yd)
Softspun Skeins (240 yd)
Small
1,200-1,400 yd
9-11
5-6
Medium
1,400-1,600 yd
11-12
6-7
Large
1,600-1,900 yd
12-15
7-8
Extra Large
1,900-2,200 yd
15-17
8-10
Buy one skein more than the estimate. Dye lots sell out, and running short mid-sleeve is the most common reason an Aran sweater becomes a half-finished project.
Step 3: Knit a Gauge Swatch and Block It
A gauge swatch is a knitted sample square used to measure your actual stitch and row counts before starting a garment. Skipping it is the most expensive shortcut in knitting.
Cast on at least 40 stitches in your cable pattern, work 6 inches, bind off, then wash and block the swatch exactly as you plan to treat the finished sweater. Measure only after it is fully dry.
Compare your blocked stitch count against the pattern's stated gauge. Brae & Heather's Addi Turbo Knitting Needles are worth considering here, since the nickel-plated tips and seamless joins let you re-swatch across several needle sizes without the yarn catching.
Addi Turbo Knitting Needles
Watch OutNever measure a swatch straight off the needles. Wet-blocked cable fabric can relax by half a stitch per inch or more, which across a 40-inch chest is several inches of finished difference.
Step 4: Learn How to Read Cable Knitting Charts
Learning how to read cable knitting charts comes down to one rule: the chart shows the right side of the fabric, and you read it in the direction you knit. Right-side rows read left to right; wrong-side rows read right to left.
Three mechanics cause most chart mistakes:
Charts are visual, not sequential. Each square is one stitch, each row of squares is one row of knitting, and the chart pictures the finished fabric from the front.
Wrong-side rows are often abbreviated. Many Aran charts print only the right-side rows and tell you to "purl all wrong-side stitches as they appear": knit the knits, purl the purls, and work cable crossings only on marked rows.
Cable crossings happen on right-side rows only in the vast majority of Aran patterns. A crossing on an even (wrong-side) row signals a specific design reason, usually a mirrored panel.
A Worked Example: Reading One Cable Repeat
Take a simple 6-stitch, 8-row left-leaning cable panel on a purl background. The chart reads:
Row
What the chart shows
What you do
1 (RS)
6 knit stitches
Knit 6
2 (WS)
6 purl stitches
Purl 6
3 (RS)
6 knit stitches
Knit 6
4 (WS)
6 purl stitches
Purl 6
5 (RS)
Cable symbol spanning 6 stitches, slash leaning left
Slip 3 to cable needle, hold in front, knit 3, knit 3 from cable needle
6 (WS)
6 purl stitches
Purl 6
7 (RS)
6 knit stitches
Knit 6
8 (WS)
6 purl stitches
Purl 6
Repeat rows 1-8. The cable crosses once every 8 rows, which is why cable panels look like rope: the crossing row is the twist, and the plain rows are the rope between twists.
Standard Cable Chart Symbols
Vertical line: knit on right side, purl on wrong side
Dot or dash: purl on right side, knit on wrong side
Diagonal slash with a number: a cable crossing that many stitches, with the number indicating how many go to the cable needle. A slash leaning left means hold the cable needle in front; a slash leaning right means hold it in back.
Bracket or shaded block: the repeat section, worked as many times as the pattern states
Blank square: usually knit on right side, purl on wrong side, unless the chart legend says otherwise
Chart vs. Written Instructions
Most Aran patterns give you both a chart and written line-by-line directions. Use the chart as your primary reference and the written directions as a backup for the first repeat. Charts are faster to track once you know the symbols, because you can see the next crossing several rows ahead.
Pro TipPhotocopy your chart and use a magnetic board or a sticky note to mark your current row. Aran charts are dense, and losing your place mid-panel is the most common cause of a cable worked on the wrong row.
Count your stitches after every cable row for the first few repeats. A dropped stitch at a crossing will not show up for several rows, and by then the error is buried. If your count is off, ladder down to the crossing row and rework it rather than ripping back the whole panel, see the troubleshooting table in Step 6.
Step 5: Cast On, Work the Ribbing, and Build the Aran Sweater Body
Cast on the full stitch count for the body, then work 2x2 or 3x3 ribbing for roughly 2 to 3 inches before beginning the cable panels. Ribbing gives the hem recovery and stops the heavy cable fabric from flaring.
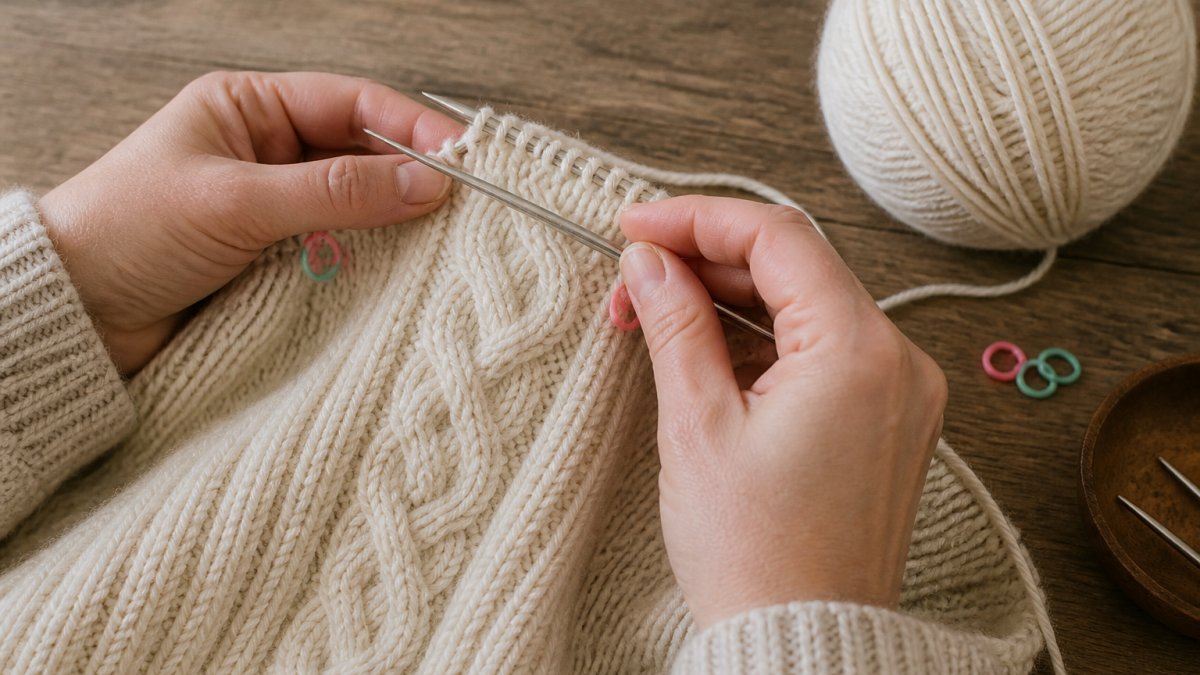
Knitter working a cable stitch on a cream wool sweater using a cable needle and stitch markers on a wooden table.
Once the ribbing is complete, place stitch markers to separate each cable panel from the purl background. Work the panels as written and keep the background in reverse stockinette. Many knitters track panels by assigning each one a marker color rather than counting stitches across the whole row.
Increasing and Decreasing for Armhole and Neckline Shaping
Shape armholes and necklines in the background purl sections, never inside a cable panel. An increase worked into a cable distorts the crossing and shows as a visible bulge.
Armhole shaping (bottom-up, seamed construction). Bind off at the beginning of each armhole edge in stages rather than all at once. A common pattern is:
Bind off 4-6 stitches once at each armhole edge
Decrease 1 stitch every other row 4-6 times
Decrease 1 stitch every 4th row 2-3 times
Use k2tog on the right-leaning edge and ssk on the left-leaning edge so the decreases mirror each other and the selvedge stays clean for seaming.
Shoulder shaping. Slope the shoulders with short rows rather than a straight bind-off, which creates a visible step at the shoulder seam on heavy cable fabric.
Watch OutDo not decrease inside a cable panel to "save stitches" at the armhole. The cable will pucker, the crossing will shift off-center, and the panel will read as a mistake even after blocking. Always move the decrease into the purl background.
Top-Down vs. Bottom-Up: Which Construction to Choose
Most traditional Aran patterns are written bottom-up and seamed: you knit the body and sleeves flat, then seam them with mattress stitch.
Top-down seamless construction starts at the neck, works the yoke in the round, and splits for body and sleeves. It eliminates seaming and lets you try the sweater on as you go, a real advantage for a garment this heavy.
If this is your first Aran sweater, bottom-up seamed construction is more forgiving, errors are easier to isolate to one piece, and the cable math is usually already worked out.
Key TakeawayAran shaping is about protecting the panels. Every decrease, increase, and short row should happen in the purl background, and every shoulder should slope rather than step.
Step 6: Troubleshoot Common Cable Errors, Seam, and Block Your Aran Sweater
Most cable errors fall into three categories, and each has a specific fix.
Problem
Cause
Fix
Cable leans the wrong way
Cable needle held front instead of back (or vice versa)
Tink back to the crossing row and rework
Loose, gaping hole at the crossing
Cable needle held too far from the needles
Hold the cable needle close and give the first stitch after the cross a firm tug
Panel drifts out of alignment
Stitch count changed several rows earlier
Count the panel stitches, then ladder down to correct
Fabric puckers beside the cable
Background worked too tightly
Go up a needle size for the purl stitches or relax tension
Seam with mattress stitch using a yarn needle, matching cable panels across the shoulder join so the pattern reads continuously. Wet-block the assembled sweater to the schematic measurements, pinning cable panels flat and letting them dry fully before removing the pins.
Key TakeawayCable definition is set during blocking, not during knitting. A sweater that looks flat and undefined on the needles will often bloom into crisp relief once it is wet-blocked and dried flat.
Conclusion
An Aran sweater rewards patience at three points: the gauge swatch, the panel placement, and the block. Rush any of them and the cables will show it.
Brae & Heather supplies the materials this project depends on, from 100% wool Aran and worsted yarns suited to cable work to the Addi Turbo needles that make swatching across sizes painless. Explore the Brae & Heather collection to find the yarn, tools, and Aran patterns that match the garment you have in mind, and start with a swatch before you cast on.
Frequently Asked Questions
Is it difficult to knit an Aran sweater?
An Aran sweater sits at the intermediate level. If you can knit, purl, and follow a chart, you can manage the cables. The real challenge is patience: a single Aran pullover uses several stitch patterns at once, so track your stitch count and mark cable rounds with stitch markers. Working a gauge swatch first, then building the body in stages, keeps the project from feeling overwhelming.
How much wool do I need for an Aran sweater?
A 4-ounce skein of Atlantic 3-ply Aran 100% Wool Yarn holds 135 yards. Buy one extra skein for swatching and any repairs later, and check dye lots so every skein matches.
What are the most common Aran sweater stitches?
The classic Aran vocabulary includes the cable stitch, honeycomb stitch, twist stitch, and simple knit-and-purl textures. Most patterns combine a center panel, side panels, and a background of stockinette or reverse stockinette. Learning to read each panel on a cable knitting chart matters more than memorizing every stitch, because the chart tells you exactly when to cross and when to purl.
How do I read a complex cable knitting chart?
Read cable knitting charts right to left on knit rows and left to right on purl rows. Each square is one stitch, and the legend defines every symbol, including the cable needle crossings. Count your stitches after each cable row to catch dropped or twisted stitches early. Placing a stitch marker between panels lets you verify each section without ripping back the whole row.



0 comments