Adjust a knitting pattern for bust darts by measuring your full bust and upper bust, then subtracting to find the bust difference. Convert that difference into stitches and rows using your gauge, and use the result to set how many short-row sets to work and where to place the turning points.
Measure full bust and upper bust in inches, and take each measurement twice.
Multiply the bust difference by your stitch and row gauge to get the extra stitches and rows.
Block your swatch before measuring gauge, since unblocked numbers throw off every calculation.
Start the first short-row set about 1 inch above the bust point's depth, measured from the armhole.
Alternate the turning side on each set to avoid a visible diagonal line.
Bust darts are shaping added to the front of a knitted top so the fabric follows the fullest part of the bust. Without them, a sweater can gape at the sides, pull across the chest, or ride up at the hem. Bust darts create room where it is needed and keep the rest of the garment close to the body.
A sweater needs bust shaping when the bust is significantly larger than the upper chest, which is common with a bust-to-high-chest difference. Knitters usually notice this in a finished top that fits well across the shoulders but feels tight or short at the front.
Watch out: adding darts without measuring first often makes the front too short or too tight. Calculate the difference before you start shaping.
Measuring Your Full Bust and Upper Bust
Start by measuring the full bust, which is the measurement around the fullest part of the chest. Keep the tape level and snug but not tight. Then measure the upper bust, which sits just above the bust and under the arms. The gap between these two numbers tells you how much shaping the garment will need.
Record both measurements in inches, since most knitting patterns in the United States list sizes that way. Take each measurement twice and use the average. A measuring partner helps because it is hard to keep the tape level on your own.
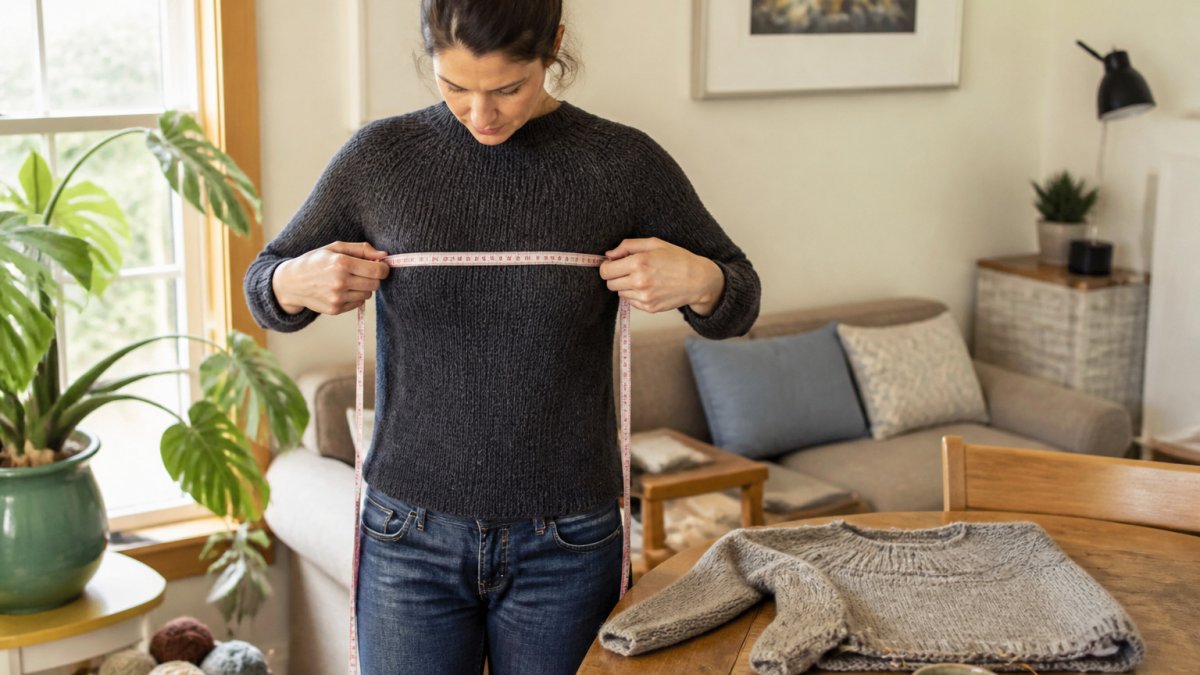
A knitter in a bright, cozy living room holds a soft measuring tape around her bust while a half-finished sweater rests on a wooden table beside her.
Diagram showing how to use a tape measure to determine full and upper bust measurements for knitting
Using a Bust Darts Knitting Calculator to Work Out Your Numbers
A bust darts knitting calculator turns your measurements and gauge into the numbers you need, but the output is only useful if you can check it by hand. Running the math once on paper helps you recognize a wrong answer when a calculator returns one.
Step 1: Find the bust difference. Subtract your upper bust from your full bust. If your full bust is 42 inches and your upper bust is 36 inches, the difference is 6 inches. That 6 inches is the total amount of extra front fabric the darts must supply.
Step 2: Convert the difference to stitches. Multiply the difference by your stitch gauge per inch. At 5 stitches per inch, 6 inches equals 30 stitches of extra width.
Step 3: Convert the difference to rows. Multiply the difference by your row gauge per inch. At 7 rows per inch, 6 inches equals 42 rows. That is the total number of short rows, counting each turning pair, that the front needs to travel the extra distance over the bust.
Step 4: Decide how many short-row sets to work. Divide the total rows by the number of rows you are comfortable turning in one set.
Step 5: Place the turning points. Measure from the side seam to the bust point and divide by two.
Step 6: Check against the pattern. Compare your total short-row count to the armhole depth in the pattern. If the darts need more rows than the armhole allows, reduce the number of sets and accept a slightly softer fit, or choose a pattern with a deeper armhole.
Full bust minus upper bust equals the bust difference in inches
Bust difference times stitch gauge equals extra stitches of width
Bust difference times row gauge equals total short rows
Total short rows divided by sets equals rows per set
Side seam to bust point divided by two equals the first turning point
Watch out: entering a stitch gauge from an unblocked swatch throws off every number downstream, so block the swatch first and re-measure. Wool fibers can relax or bloom after blocking, and a half-stitch-per-inch error compounds across 42 rows.
Horizontal Bust Darts Knitting: Short-Row Placement and Method
Horizontal bust darts use short rows worked across the front of the garment. You knit partway across a row, turn, and work back, which adds extra fabric at the bust without changing the stitch count. The technique is the same whether the garment is worked top-down or bottom-up; only the direction of travel and the row reference change.
Placement. The turning points should sit below the fullest part of the bust, not on it. Measure from the armhole to the bust point and subtract about 1 inch. If the bust point is 9 inches below the armhole, begin the first short-row set about 10 inches down.
Method. Use one turning method consistently, wrap and turn, German short rows, or Japanese short rows. German short rows are the easiest to read back because the doubled stitch is visible.
Top-down versus bottom-up. In a bottom-up sweater, the short rows are worked as you approach the armhole, so the turning points are measured up from the hem. In a top-down sweater, they are worked as you move away from the neckline, so the turning points are measured down from the armhole.
Stitch-pattern and chart preservation. Short rows interrupt a flat row, so plan turns to land inside a repeat rather than across a cable crossing or a colorwork block. For lace, choose a turning point in a plain or garter column.
Seamed versus seamless. In a seamed garment, work the darts on the front piece only and leave the back as written.
Watch out: turning in the same direction every time creates a visible diagonal line, so alternate the side you turn toward on each set. If the front hem lifts after blocking, the darts were placed too high or too many rows were worked in one set; frog back one set and redistribute the rows.
The article's key placement and method choices for horizontal bust darts come down to a few checkable points.
Step
What to do
Time or frequency
Place first set
Start about 1 inch above the bust point's depth, measured from armhole
About 10 inches down from armhole
Space the sets
End the last set about 1 inch above the bust point
Roughly 1 inch above bust point
Choose a turning method
Use one method consistently: wrap and turn, German, or Japanese
Same method every set
Alternate turns
Turn toward a different side on each set
Every set
Mark each set
Place a locking stitch marker at the start of each set
At the start of each set
Check after blocking
Confirm the hem stays level; redistribute rows if it lifts
After blocking
Vertical Bust Darts Knitting: Increases and Decreases Up the Front
Vertical bust darts add width up the front of the garment with increases and decreases. Increase stitches at the side of the bust, then decrease them as the front rises toward the shoulder. This keeps the shaping running in a line from the hem to the armhole.
Work the increases and decreases evenly on both sides of the front. Keep track of the count on a sheet of paper, because it is easy to lose your place when the front is shaped.
When you work a stitch pattern or colorwork on the front, plan your increases so they fall inside the pattern repeat. This keeps the design intact.
Bust Darts Knitting Bottom Up: Adjusting a Sweater Mid-Project
Many knitters discover the bust needs room after they have knit the body of a sweater. Adjusting mid-project is possible if the garment is worked bottom up. Measure the finished body on your body, then decide where the darts should start.
Work the adjustment on the front only, and leave the back as written. Unpick the front to the point where the darts begin if the change is large. For a smaller change, add short rows at the bust.
Check the fit often. Try the sweater on before you work the armholes, because the front length and dart placement are easier to fix at that stage.
Trying On, Troubleshooting and Keeping Your Stitch Pattern Intact
Try the garment on before you finish the neckline and sleeves. Check that the bust sits comfortably, the front hem is level, and the darts do not pull or pucker. Pinning the front sections together helps you see the result.
If the fabric looks uneven, check your tension first. Inconsistent knitting tension is a common cause of puckering around darts. Block the garment before you judge the fit, because blocking can change the shape of wool.
When you adjust a stitch pattern or chart for darts, check each repeat after the change. Count the stitches in each repeat and confirm that the pattern still lines up at the side seams.
Your Next Fitted Sweater: Choosing a Pattern to Adjust
Choose a pattern with simple front shaping, a stitch pattern you can read easily, and clear instructions for the garment construction. Patterns written for top-down or bottom-up construction each handle bust shaping differently, so pick one that fits how you like to knit.
Before you buy the yarn, check your gauge against the pattern and make sure the pattern includes a range of bust sizes. A pattern with clear measurements makes the calculation easier.
For yarn, Brae & Heather offers Shetland wool and knitting patterns. Browse the collection on the Brae & Heather website to find a pattern and yarn that match your next project. adjust knitting patterns for bust darts
Frequently Asked Questions
How do you bust darts in knitting?
Bust darts are made by working short rows or increases and decreases over the front of a sweater so the fabric has extra length where the bust sits. Start by measuring your full bust and comparing it to the pattern's finished bust measurement with the ease you want. Work the extra front rows in one of two ways: short rows that stop partway across the front, or vertical increases and decreases up the center front. Check the fit with a try-on before you finish the rest of the garment.
Should bust darts be pressed up or down?
Bust darts are generally not pressed flat. Blocking the finished sweater to its measurements is usually enough to relax the stitches and let the extra length settle over the bust. Pressing hard can flatten the texture of a stitch pattern and remove the shaping you worked. Check the yarn label for blocking guidance and test on a swatch first if you are working with a delicate stitch pattern or a fiber that does not hold shape well.
What is the difference between horizontal and vertical bust darts in knitting?
Horizontal bust darts are worked with short rows that add length across the front only, so the extra fabric sits in a band under the bust. Vertical bust darts add length up the center front, usually through increases and decreases, so the shaping runs in a column. Horizontal darts suit most fitted pullovers worked in stockinette, while vertical darts can be easier to hide within a patterned or textured front. Choose the method that suits your stitch pattern and construction.
How do you add bust darts to a bottom-up sweater?
In a bottom-up sweater, add bust darts after you have worked the body to just below the underarm, when you can try the garment on and see where the fullest part of your bust falls. Mark the placement with stitch markers, work the short rows or shaping at that point, and continue to the armholes. Measure the front length from the hem to the bust point before you start so you know how many extra rows you need.
Woolen sweaters with well-placed bust darts are worth the extra planning. With careful measurements, a good gauge, and a pattern that suits your construction, your next fitted sweater can fit the way you intended.




0 comments