Why Advanced Colorwork Knitting Demands a New Approach in 2026
Colorwork knitting is the practice of working two or more colors into a single fabric, most often through stranded techniques where unused yarn travels behind the work. This guide from Brae & Heather examines the techniques that separate competent colorwork from genuinely refined colorwork: tension control, color dominance, steeking, and the tools that make complex motifs manageable.
Stranded Colorwork Tension Tips for Consistent Stitches
Tension is the single most common failure point in stranded knitting. Uneven floats create puckering, and puckering ruins the geometry of a motif regardless of how well the chart was followed.
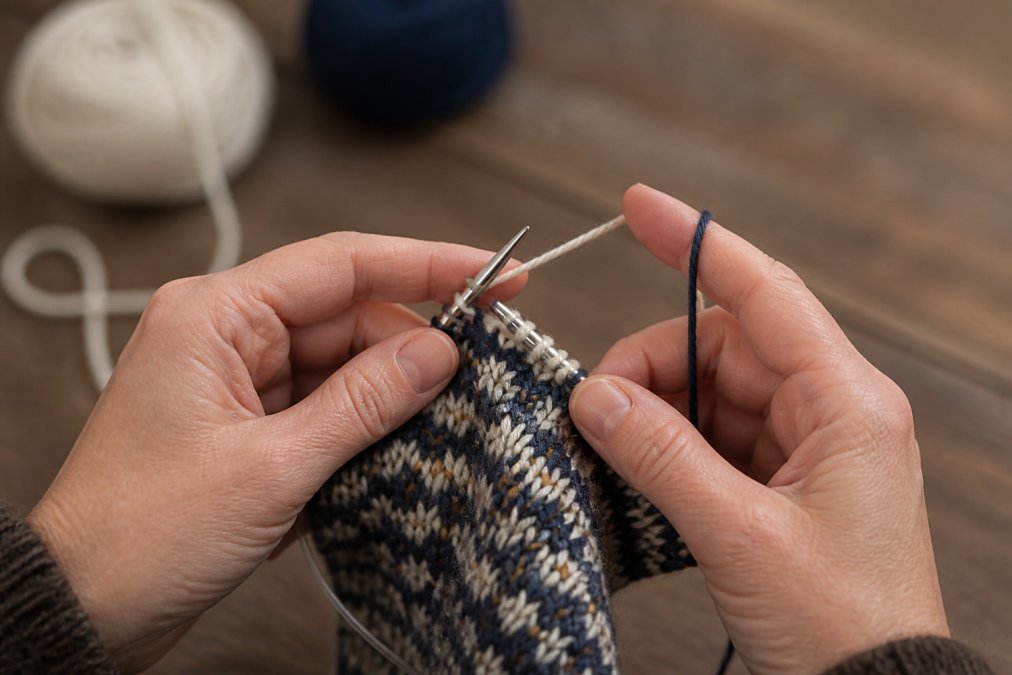
Diagram demonstrating even yarn tension techniques for two-handed colorwork knitting projects.
Two-Handed Knitting and Yarn Carry Methods
Holding one color in each hand, English style in the right and continental in the left, is the method most experienced colorwork knitters settle on. It keeps the two strands physically separated, which reduces tangling and makes color dominance easier to control. Knitters who prefer one-handed work can carry both strands over the same finger, but the strands must be kept in a consistent order or the dominant color will shift mid-project.
Fixing Puckering and Tension Adjustment
Puckering almost always traces to floats that are too tight. Blocking can relax minor cases, but prevention is faster. Try working the project on one needle size larger than the gauge swatch suggests, then switching to the correct size for plain stockinette sections.
Pro TipWhen a motif spans many stitches, stretch the fabric gently on the right-hand needle before working the next stitch. This sets the float length at the width the finished fabric will actually need.
Steeking Techniques for Advanced Knitters: Cutting Without Fear
Steeking is the technique of knitting a garment in the round and then cutting it open to create cardigans, armholes, or necklines. The cut is safe because extra stitches, called a steek, are worked at the intended opening and then secured before the scissors come out.
Reinforced Steeks and Finishing Techniques
Three reinforcement methods dominate: machine-sewn lines on either side of the cut, crocheted chains worked through the steek columns, or a hand-sewn backstitch. Machine sewing is fastest for wool that felts readily. Crochet reinforcement suits knitters without a sewing machine and adds a firm edge that holds up well. After cutting, the raw edges are folded back and finished with a woven or knitted band.
Watch OutCutting a steek in superwash wool is riskier than cutting traditional non-superwash wool. Superwash fiber resists felting, so the raw edges will not lock together on their own. Reinforcement is not optional in that case.
Choosing Premium Wool for Colorwork: Fiber, Weight, and Color Palette
Yarn choice determines how a colorwork motif reads. Wool with good stitch definition and a slight halo is the traditional choice because it holds the crisp edges that make Fair Isle and stranded patterns legible. But "good wool" is not a single property, it is the sum of crimp, staple length, spin, and halo, and each of those interacts differently with floats.
Why Wool Mechanics Matter for Stranded Fabric
Crimp is the natural wave in a wool fiber. High-crimp wools, such as Shetland and other heritage breeds, trap air and produce a springy fabric that pushes floats back into the fabric rather than letting them sit proud on the wrong side. Low-crimp wools lie flatter and can let long floats show through to the front on the next row.
Matching Weight to Motif Scale
Yarn weight should match the motif scale. Fine two-ply suits intricate patterns with small repeats, where each stitch is a single pixel of the design. Sport and DK weights suit bolder geometric designs where each stitch carries more visual weight and a small repeat would look cramped.
Project Type
Recommended Weight
Typical Needle
Best For
Mittens and gloves
2-ply / lace
2.0-2.5 mm DPNs
Intricate repeats, Latvian braids
Socks
Fingering
2.25-2.75 mm
Small motifs, animal designs
Hats and cowls
Sport / DK
3.0-4.0 mm circular
Bold geometric patterns
Cardigans
DK / worsted
4.0-5.0 mm circular
Steeked openings, larger motifs
Building a Palette That Reads
The palette is where most colorwork projects succeed or fail, and the failure mode is almost always value, not hue. A palette of six colors that all sit at the same value will produce a muddy fabric no matter how beautiful the skeins look side by side.
A practical method:
Choose a value structure first, for example, one dark, two mid-tones, and one light.
Assign hues to those value slots second.
Keep one accent color for the smallest motif elements; accents lose their punch if they appear everywhere.
Limit the palette to five or six colors for a single garment; more than that and the eye loses the pattern.
Key TakeawayChoose value first, hue second. A palette that works in grayscale will work in color; a palette that only works in color will fail in low light, in photographs, and at a distance.
Understanding Color Dominance and Color Theory for Knitters
Color dominance describes the tendency of one yarn to sit visually in front of the other in stranded fabric. The strand held lower and to the left typically reads as dominant, which means the same chart can produce two different-looking fabrics depending on how the yarns are carried.
Key TakeawayIf a motif looks muddy in grayscale, it will look muddy in person. Value contrast is the load-bearing element of any colorwork design.
Reading Knitting Charts and Digital Design Tools for Complex Motifs
A knitting chart is a grid where each square represents one stitch and each row represents one round or row of knitting, read from the bottom up. Flat knitting charts alternate reading direction; circular charts are read right to left on every row. That much is standard. What separates advanced chart work from intermediate chart work is knowing how to read a chart as a design document, and how to use digital tools to modify it without redrawing by hand.
Reading Charts as Design Documents
A chart encodes more than stitch placement. It encodes rhythm. When you read a chart, look for the repeat unit first, then the offset between rows, then the symmetry (or deliberate asymmetry) of the motif. Most traditional colorwork motifs are built on a small repeat that tiles across the row and stacks vertically with a half-drop or full-drop offset.
Treating the chart as a literal picture rather than a tiling pattern, which leads to motifs that break at the side seams.
Ignoring the relationship between chart scale and gauge, which leads to motifs that look correct on paper but stretched or compressed in the finished fabric.
Digital Design Tools: The Workflow Competitors Skip
Most guides stop at "use software." The useful question is what the software lets you do that graph paper does not. Chart-editing tools allow you to recolor a motif instantly, test a palette against a photograph of your actual yarn, adjust the repeat count, and grade the motif across sizes, all without redrawing.
The workflow that most designers settle into:
Start with a motif that fits the desired repeat count.
Map the motif onto a gauge swatch to confirm scale, a motif that is 24 stitches wide at 8 stitches per inch is 3 inches wide, which may or may not fit the intended panel.
Adjust the color palette using value contrast as the primary filter, not hue.
Test the full repeat in a swatch before casting on the project.
Grade the pattern for the target size, checking that the motif still centers correctly at each size.
Adapting Existing Charts
Adapting a chart is a legitimate design skill, not a shortcut. The most common adaptations are changing the repeat count to fit a different gauge, swapping the palette while preserving value structure, and converting a flat chart to a circular chart (or the reverse). Each of these changes the way the motif reads, so each should be tested in a swatch before it is committed to a garment.
Pro TipWhen adapting a chart, change one variable at a time. If you change the repeat count and the palette in the same swatch, you will not know which change caused a problem.
Ergonomics for Long-Duration Colorwork Sessions
Colorwork sessions run long. A single mitten cuff can take several hours, and stranded knitting requires more hand and wrist movement than plain stockinette. Wrist and thumb strain builds quietly and then interrupts a project for weeks.
Practical adjustments that help:
Switch needle types if the current pair requires a tight grip
Use a knitting belt or fixed circular setup to reduce arm weight
Work in 25-minute blocks with a short break between
Keep the working yarn close to the needles to limit reaching
Check posture: elbows should stay near the body, not lifted
Conclusion: Elevating Your Advanced Colorwork Knitting Practice
The gap between intermediate and advanced colorwork is rarely about knowing more stitches. It is about tension control, deliberate color choices, and the confidence to cut a steek without hesitation. Each of those skills improves with focused practice on small projects before it is applied to a full garment.
Frequently Asked Questions
What is the most challenging advanced colorwork knitting technique to master?
Steeking is often cited as the most challenging advanced colorwork knitting technique because it requires cutting through your knitted fabric. The key is to reinforce the steek area with either a crochet chain or sewing machine stitches before cutting. Practice on a small swatch first, and use a wool yarn that grips well, such as Shetland wool, to prevent unraveling. With proper preparation, steeking opens up efficient ways to knit cardigans and armholes in the round.
How do I maintain consistent tension in stranded colorwork?
Consistent tension in stranded colorwork comes from managing your floats and yarn carry. Keep floats no longer than five stitches, and spread your stitches on the right needle before knitting the next color. Try two-handed knitting: hold one color in each hand to control yarn feed. Swatch in the round to check gauge, and adjust needle size if needed. Regular blocking also helps even out minor tension inconsistencies.
What is the difference between intarsia and stranded colorwork?
Intarsia uses separate yarn bobbins for each color block, with no floats carried across the back, making it ideal for large single motifs. Stranded colorwork carries two or more yarns across the row, creating floats behind the fabric, which is better for repeating patterns and small motifs. Intarsia prevents bulk in large color areas, while stranded knitting is faster for allover designs. Many advanced projects combine both techniques.
How does fiber choice affect advanced colorwork projects?
Fiber choice affects stitch definition, warmth, and durability in advanced colorwork. Wool, especially Shetland wool, is ideal because its natural crimp helps floats grip and prevents puckering. All-natural fibers like wool and alpaca block beautifully, blending stitches. For heirloom pieces, choose a smooth, worsted-spun wool that shows colorwork clearly and wears well over time.
What are the best tools for managing multiple yarn colors?
For managing multiple colors, use circular needles in the right size for your gauge, and double-pointed needles for small circumferences like mittens. Yarn bobbins or clothespins keep intarsia colors organized. A knitting chart holder or digital tablet stands keep your place. For stranded work, a yarn guide ring can separate colors. Always swatch with your chosen tools to ensure comfort and consistent tension.
What is the knitters curse?
The knitter's curse refers to the phenomenon where a knitter's gauge changes over time, often loosening or tightening, which can alter the fit of a project. It's especially problematic in advanced colorwork where consistent tension is crucial. To avoid it, swatch regularly, check gauge throughout your project, and block your swatch as you would the finished piece. Using the same needles and yarn throughout also helps maintain consistency.



0 comments