A reversible cable scarf looks finished on both sides, so you can wear it either way. Beginners should start with a simple two-stitch twist, which has a short repeat and is easy to check on both faces. Confirm the pattern gives separate instructions for every row before casting on.
Choose a simple two-stitch twist or ribbed cable for your first reversible scarf.
Check that the pattern shows both faces of the fabric and gives instructions for every row.
Read the stitch multiple, such as 4 + 2, and confirm your cast-on count matches it.
Knit a 6-inch swatch and check both faces in daylight before starting the full scarf.
Place a marker at the start of each repeat and count stitches after every cable row.
A reversible cable scarf looks finished on both sides. That is the whole point. Each face shows the same crisp cables, so you can wear it either way and no one can tell which side is the back.
Reversible cable knitting patterns for scarves are built differently from standard cables. The designer plans every crossing so that both faces show clean, balanced texture.
How Reversible Cables Differ from Standard Cables
A standard cable has a clear front and a plain back. The back usually shows floats and strands of yarn that look messy. Reversible cables avoid that problem.
Standard cables: one visible face, purl-heavy reverse side
Reversible cables: two visible faces, balanced stitch structure
Result: a scarf that works as a double-sided accessory
How to Identify a Truly Reversible Cable Pattern
Before you cast on, check whether the pattern is truly reversible. Look for these signs:
The pattern uses a symmetrical cable structure on both sides
The written instructions give separate instructions for every row, not just the right side
The schematic or photos show both faces of the fabric
If a pattern only shows one side, treat it as a standard cable.
Choosing the Right Reversible Cable Stitch for a Scarf
Not all reversible cables behave the same on a scarf. Two patterns can both be truly two-sided yet produce very different fabric, one dense and sculptural, another soft and drapey. Before you commit to a pattern, compare the stitch options on the dimensions that actually affect a scarf: texture, difficulty, stitch multiple, fabric thickness, and drape.
Side-by-Side Comparison of Common Reversible Cable Stitches
Stitch option
Texture
Difficulty
Typical stitch multiple
Fabric thickness
Drape
Simple two-stitch twist (1/1 or 2/2)
Subtle, rope-like
Beginner
4 + 2
Light to medium
Good
Ribbed cable (cable over knit/purl rib)
Crisp, defined
Advanced beginner
6 + 2
Medium
Moderate
Braided or rope cable
Bold, sculptural
Intermediate
8 + 2
Medium to heavy
Limited
Lattice or interlocking cable
Complex, allover
Intermediate to advanced
12 + 2
Heavy
Limited
Wave or undulating cable
Soft, flowing
Intermediate
10 + 2
Medium
Good
Use this table as a starting filter, not a rule. A simple two-stitch twist is the easiest place to learn because the crossing is short and the wrong side stays tidy with minimal planning. A braided cable looks impressive but adds bulk, which can make a long scarf feel stiff. Lattice and interlocking cables are the most demanding to memorize and the least forgiving of a misplaced crossing.
Matching the Stitch to Your Skill and the Scarf's Purpose
First reversible scarf: choose a simple two-stitch twist or a ribbed cable. The repeat is short, the crossings are easy to check, and mistakes are visible quickly.
A scarf you want to drape: favor a wave or simple twist in a lighter gauge. Dense braids and lattices hold their shape but resist folding.
A statement accessory: a braided or lattice cable gives the most visual impact, but plan for a shorter or narrower scarf so the weight stays comfortable.
A gift or travel project: pick a stitch with a repeat you can memorize in a few rows. Complex charts are hard to work on the go.
How to Read the Stitch Multiple Before You Cast On
Every reversible cable pattern states a stitch multiple plus edge stitches. For example, a pattern might read "multiple of 6 + 2." That means the cable repeat uses 6 stitches and you add 2 edge stitches for a clean border. Multiply the repeat by the number of pattern repeats you want across the scarf, then add the edge stitches. If your cast-on count does not match, the cables will shift and the edges will pull.
Pro TipBefore casting on the full scarf, knit a 6-inch swatch in your chosen stitch. Check both faces in daylight. A stitch that looks balanced on the right side can reveal a loose or twisted wrong side that only shows up after blocking.
Where to Compare Ready-Made Reversible Cable Designs
Browse Brae & Heather's pattern collection to see how different reversible cable stitches behave in finished scarves. Compare the photos of both faces before you choose.
Key TakeawayChoose the simplest stitch that gives the look you want. A short repeat you can read on both sides beats a complex cable you cannot troubleshoot.
Reversible Cable Scarf Yarn Requirements, Gauge, and Needles
Yarn choice affects how clearly the cables show. A wool with some twist keeps stitch definition crisp. Choose a medium weight yarn for a scarf that is warm but not bulky. Check the yardage on your pattern and buy a little extra so you finish the project without running short.
Gauge matters because it sets the final width and drape. Knit a small swatch, wash and dry it the way you will treat the finished scarf, then measure. Adjust your needle size until you match the pattern gauge.
Use needles that suit the yarn and your hands. Many knitters find a straight pair easiest for a scarf. A cable needle is also required for the crossings.
This walkthrough uses a simple two-stitch reversible cable as a worked example so you can see exactly how the rows fit together. The same logic scales to larger crossings. Read each row before you knit it, and place a marker at the start of every repeat so you can check your work as you go.
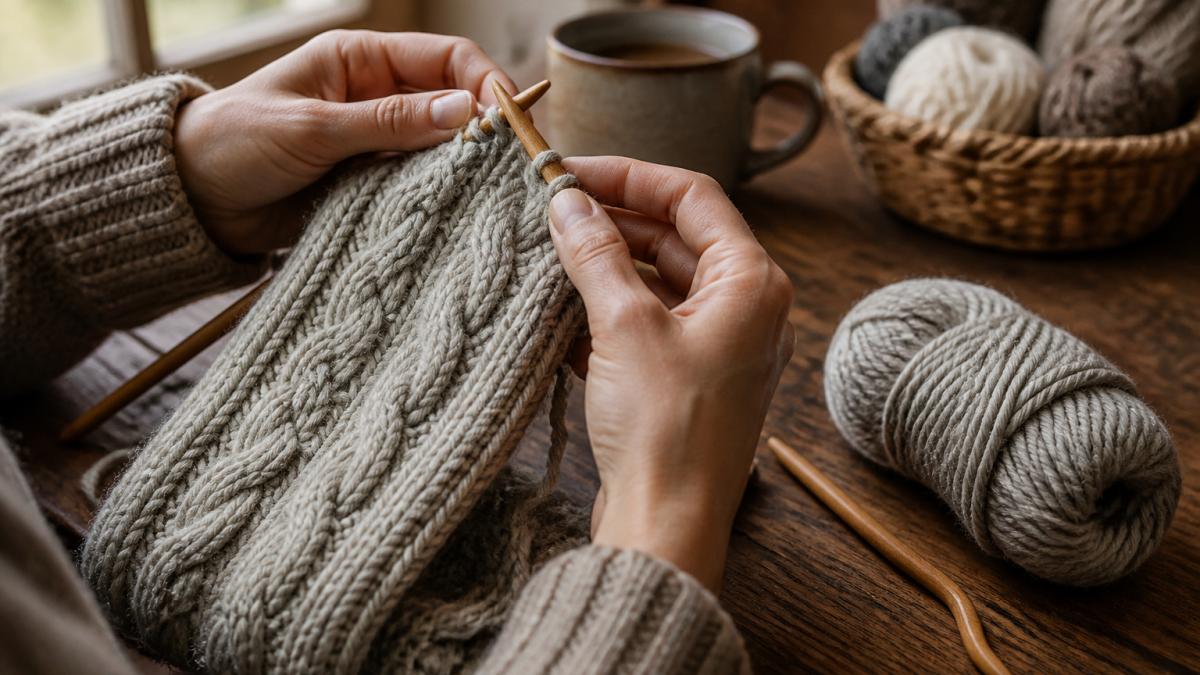
Hands knitting a textured cable scarf on wooden needles with a cable needle and wool skein nearby
Abbreviations Used
k, knit
p, purl
cn, cable needle
C2F, slip 1 stitch to cn and hold in front, k1, then k1 from cn
C2B, slip 1 stitch to cn and hold in back, k1, then k1 from cn
rep, repeat
Setting Up Your Stitch Count and Pattern Repeat
For the example, cast on a multiple of 4 + 2 edge stitches. Work 4 rows of seed stitch or garter stitch as a border so the scarf edges lie flat. Then begin the cable pattern.
Count the stitches before the first cable row. A count off by one stitch will shift every crossing.
Place a stitch marker at the start of each 4-stitch repeat.
Keep the first and last stitch of every row as a slipped or garter edge stitch for a clean border.
Working the Cable Crossings Row by Row
Row 1 (right side): k1 (edge), *k2, p2; rep from * to last stitch, k1 (edge).
Row 2 (wrong side): k1, *k2, p2; rep from * to last stitch, k1.
Row 3 (cable row): k1, *C2F, p2; rep from * to last stitch, k1.
Row 4: k1, *k2, p2; rep from * to last stitch, k1.
Repeat Rows 1-4 for the pattern. On Row 3, the C2F crossing twists the two knit stitches to the front while the purl stitches stay in place. Because the purl columns run on both faces, the wrong side shows a clean mirrored texture rather than floats.
Pro TipWork the first crossing slowly and check it before you continue. Lay the fabric flat and look at both faces. If the crossing leans the wrong way, you held the cable needle on the wrong side.
Checkpoints to Catch Mistakes Early
After every cable row: count the stitches between markers. Each repeat should still have 4 stitches.
After every 4 rows: check that the cable twists in the same direction as the previous twist. Alternating direction is a design choice, not an accident, confirm which one your pattern uses.
Every few inches: look at the wrong side. A truly reversible cable shows an organized, balanced texture there, not loose strands.
Adapting the Walkthrough to Larger Crossings
The same four-row rhythm works for wider cables. A 2/2 cable (C4F or C4B) holds two stitches on the cable needle instead of one. The plain rows between crossings stay the same. The larger the crossing, the more rows you usually work between cable rows so the fabric does not pull.
Watch OutIf you lose your place, do not rip back the whole scarf. Count back to the last clean cable row, place a lifeline through the stitches, and rejoin the pattern there.
Troubleshooting Common Cable Mistakes
Most cable problems are easy to fix if you catch them early.
Twisted or uneven crossings: Check that you held the cable needle on the correct side.
Stitch count drift: Count after each repeat and correct the error before continuing.
Loose cables: Tighten your tension on the crossing stitches.
Wrong side looks messy: Confirm that you followed the reversible instructions for both faces.
If you lose your place, count back to the last clean row and rejoin the pattern there.
Blocking, Finishing, and Sizing Your Scarf
Blocking opens up the cables and evens out the fabric. Wash the scarf gently, lay it flat on a towel, and shape it to the finished measurements in your pattern. Let it dry completely before wearing.
Check the finished size against the pattern. If you want a longer or wider scarf, add repeats of the stitch pattern and recalculate your yarn needs. Weave in all loose ends so the scarf looks neat on both sides.
Start Your Next Reversible Cable Scarf with Brae & Heather Patterns
Reversible cable scarves reward patience and careful counting. Brae & Heather offers knitwear patterns and resources to help you plan a scarf you can wear on either side. Visit the Brae & Heather website for current prices and product details, and start your next project with a pattern you trust.
Frequently Asked Questions
What makes a cable knitting pattern reversible?
A reversible cable pattern is worked so that both faces of the fabric look finished. The cables are typically built with a consistent stitch structure on each side, so there is no distinct wrong side. Scarves are a popular choice because the fabric is usually worked flat and both sides are visible when worn. When evaluating a pattern, look for a written note that the fabric is two-sided and for a chart that shows the stitches on both right-side and wrong-side rows.
Can beginners knit a reversible cable scarf?
Yes, with some preparation. Beginners should be comfortable with knit and purl stitches before starting, and a simple cable with a short repeat is the best first project. Working with a light, smooth yarn helps you see the stitches clearly. Count your stitches at the end of each row, and use a cable needle to hold stitches while you cross them. A scarf is a forgiving first project because mistakes can be corrected by unraveling a few rows.
How much yarn do I need for a reversible cable scarf?
Yarn needs depend on the yarn weight, scarf width, scarf length, and the cable density of the pattern. Cable-heavy designs generally use more yarn than plain scarves of the same size because the crossings pull the fabric. Check the pattern's stated yardage, which is based on a specific gauge and finished size. If you change the width or length, recalculate your yardage before you buy. Pricing depends on quantity, dates, and delivery, so check Brae & Heather's website for current prices and availability.
Do reversible cable scarves use more yarn than regular cable scarves?
Often they do, because reversible constructions usually require the stitch structure to be consistent on both sides, which can mean more stitches per cable. The exact difference depends on the stitch pattern and the yarn weight. Compare the stated yardage of a reversible pattern against a standard cable scarf of the same dimensions. Build in a margin for mistakes and for the extra length needed for blocking and finishing.




0 commentaire