Every knitter has one: a bag or bin holding the sweater that stalled around the second sleeve. Learning how to finish unfinished knitting projects starts with understanding why they stopped. This guide covers assessing a dormant WIP, frogging or finishing it, and blocking the result.
Unfinished knitting projects, or WIPs, are garments cast on but never completed. They stall for predictable reasons, and the fix depends on which applies to yours.
Common Reasons Projects Stall
The most frequent culprit is a pattern that outpaced the knitter's skill level. Cables, complex colorwork, or a fitted sleeve cap can stop a project cold when the instructions assume knowledge the knitter hasn't built yet. Others stall from boredom: miles of stockinette test patience more than technique.
Gauge problems derail plenty of WIPs too: a swatch that measured correctly in the shop can behave differently once the full piece is underway, and a knitter who notices the fabric pulling tight may set the project aside rather than rip back. Life interruptions, a yarn shortage, or a dropped stitch discovered three rows later all contribute. None of these are failures, they are ordinary pauses.
The Emotional Weight of Inherited and Sentimental WIPs
A different category of unfinished work carries grief alongside the yarn. Inherited crafts, like a half-knit cardigan from a grandmother, sit in a box because finishing them feels like closing a chapter. The sentimental value is real, and so is the guilt.
These projects need a gentler approach. The goal isn't speed; it's deciding whether the piece should be completed, repurposed, or preserved as-is. There is no wrong answer, and volunteer finishers who specialize in inherited handwork exist for exactly this situation.
How to Assess an Unfinished Knitting Project
Assessment is the step most knitters skip, and it determines everything that follows. Examine the work itself, not the pattern, not your memory of casting on, before deciding its fate.
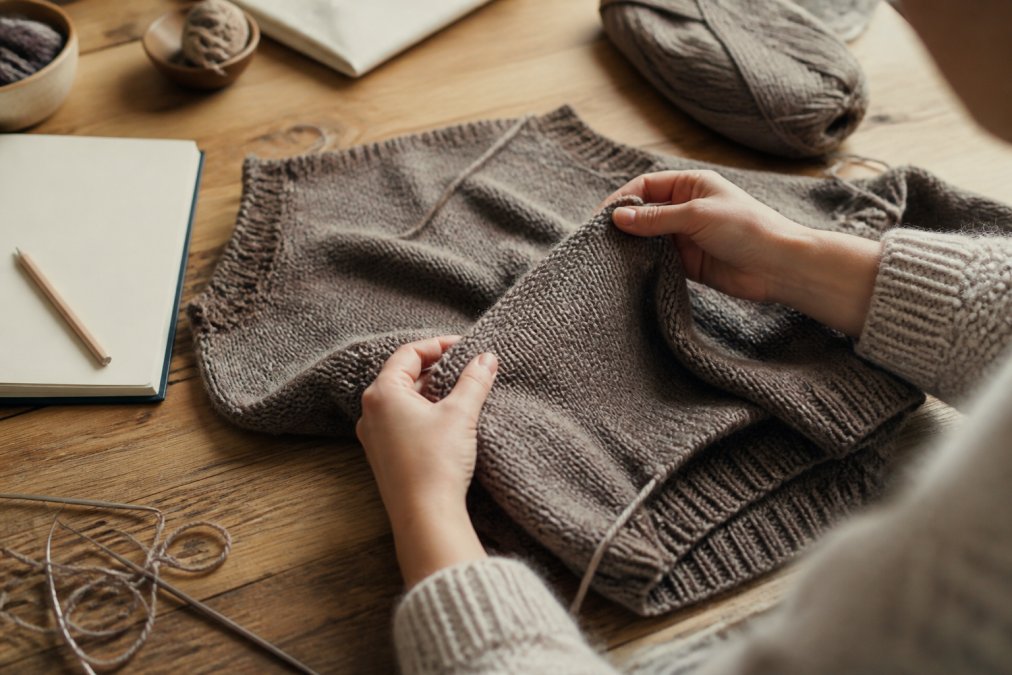
A close-up of a knitter's hands gently examining a half-finished knitted sweater on a wooden table, with a notebook and pencil nearby for notes, soft natural light
Step 1: Identify the Stitch Pattern
Lay the fabric flat and look at the right side under bright, angled light. Stockinette shows smooth columns of V-shaped stitches on the front and horizontal bumps on the back. Garter stitch shows bumps on both sides. Ribbing shows vertical columns that pull in. Cables appear as raised, twisted ropes. Stranded colorwork shows two or more colors carried across the back with visible floats.
If the original pattern is lost, the fabric still tells the story. Count the stitches across a single repeat, a cable panel, a colorwork motif, a lace eyelet, and write that number down. That count anchors your search for a matching pattern later.
Step 2: Determine the Yarn Weight
Yarn weight is the most useful clue for matching an unknown project to a pattern. Measure the stitches per inch in the existing fabric, then compare it to standard gauge ranges:
Weight
Typical stitches per inch (stockinette)
Common needle size
Fingering
7-8
US 1-3
Sport
6-6.5
US 3-5
DK
5.5-6
US 5-7
Worsted
4.5-5
US 7-9
Bulky
3-3.5
US 10-11
Super bulky
2-2.5
US 13+
Measure over a four-inch square in the middle of the fabric, away from edges, and divide by four. If the fabric is ribbed or cabled, measure the relaxed stockinette section instead, textured stitches pull in and mislead.
Step 3: Estimate the Needle Size
If the needles are still in the work, check the shaft or cable join for a printed size. If they're gone, hold the fabric next to a needle gauge and find the slot the stitches sit in most comfortably. A stitch that slides freely means the needle was likely one size larger; one that barely fits means that size or smaller. Treat this as a starting point for a gauge swatch, not a guarantee.
Step 4: Check the Gauge Against the Pattern
If you have the pattern, knit a fresh swatch on the estimated needle size and compare it to the pattern gauge. If the existing fabric matches, pick up where the previous knitter left off. If it doesn't, either rip back to the last clean row and re-knit at the correct gauge, or accept the fabric and adjust the pattern to fit. The second option works for scarves, shawls, and blankets; it rarely works for fitted garments.
Step 5: Look for Dropped Stitches and Yarn Damage
Run the fabric under good light and look for dropped stitches, split plies, or moth damage. A single dropped stitch in stockinette can be repaired with a crochet hook in minutes: insert the hook into the live loop from the front, catch the horizontal bar behind it, and pull it through. Repeat up the column until the stitch reaches the needle. Moth holes, small, clean-edged holes, thinning patches, or gritty residue, may mean the yarn isn't salvageable. Check the working yarn for breaks or felting, and confirm there's enough left to finish. A common rule of thumb is that you need roughly three to four times the finished length of the row in working yarn, so estimate the remaining rows and compare (craftyarncouncil.com).
Pro TipPhotograph the fabric, the yarn label (if you have it), and any pattern notes before you touch anything. If the project goes back in the bin, those photos are your record for next time.
Deciding Whether to Finish, Frog, or Repurpose
The decision framework is simple: finish it if the pattern, yarn, and fit still excite you. Frog it if the yarn is worth reclaiming. Repurpose it if the work has value but the original plan doesn't.
A Simple Decision Framework
Use this matrix to sort a stalled WIP in under five minutes:
Question
If Yes
If No
Do you still like the finished object?
Finish it
Frog or repurpose
Is the yarn high quality and reusable?
Frog and reclaim
Repurpose as-is
Is the piece sentimental or inherited?
Consider a volunteer finisher
Donate or preserve
Is the gauge still workable?
Continue as planned
Rip back to the problem row
Pro TipSet a fifteen-minute timer and work on the stalled WIP for that window only. Many knitters find the project moves again once the mental block of "finishing it all" is removed.
How to Frog a Knitting Project and Repurpose the Yarn
Frogging, or unraveling a knitted piece, reclaims the yarn for a new project. The process is straightforward, but the yarn needs care afterward, the difference between yarn that behaves like new and a tangled, kinked mess comes down to technique.
Before You Frog: Decide What's Worth Saving
Not every project is worth unraveling. Frog if the yarn is a natural fiber you'd happily buy again, the piece is mostly intact, and the yarn isn't felted or matted. Don't bother if the yarn is heavily worn, the fibers have fused from agitation or heat, or the recovered yardage won't cover anything useful. Weigh the finished piece on a kitchen scale and compare it to the original skein weight, the difference tells you roughly how much yarn you'll recover.
Step-by-Step: How to Frog Without Making a Mess
Find the right end. Locate the bind-off edge or the cast-on tail. The bind-off edge is usually easier because the yarn pulls free in a continuous strand. If it's tight or felted, start at the cast-on instead.
Unpick the first few stitches by hand. Use a tapestry needle or your fingers to loosen the first three or four stitches. Once the yarn is free, the rest unravels in a steady pull.
Wind as you go, not after. Wind the unraveled yarn into a loose skein around the back of a chair or your hand and elbow as you pull. Winding after the fact is how tangles happen.
Tie the skein in three or four places. Use scrap yarn in a contrasting color to secure the skein at even intervals. This keeps strands aligned through washing and drying.
Wash gently in cool water. Fill a basin with cool water and a wool-safe wash. Submerge the skein and soak 15-20 minutes. Do not agitate, agitation plus heat causes felting, and felted yarn cannot be un-felted (woolmark.com).
Press, don't wring. Lift the skein out, press it between two towels, and lay it flat to dry. Hanging a wet skein by one end stretches the fibers.
Wind into a cake or ball once dry. A ball winder and swift make this fast, but a hand-wound center-pull ball works fine. Wind loosely, tight winding puts the yarn under tension and it will relax unevenly in the next project.
Why Reclaimed Yarn Looks Different (and How to Fix It)
Reclaimed yarn often has a crinkled, wiry texture until it's washed. The kinks are memory, the yarn remembering the shape it held in the fabric. A cool soak relaxes most of it. For stubborn kinks, soak again with a small amount of wool wash and let the skein rest flat overnight before winding. Once relaxed, the yarn behaves like new and works well for colorwork, accessories, or swatches. Avoid heavily kinked reclaimed yarn for fitted garments until fully relaxed, because the kinks can distort gauge.
Repurposing Options Beyond Re-Knitting
If the yarn isn't worth reclaiming but the work has value, there are other paths:
Finish it as-is if the fabric is sound and the size works for someone, a child, a charity recipient, a friend.
Repurpose the fabric by cutting and seaming it into a pillow cover, small bag, or patch for a visible-mend project.
Preserve it if it's inherited or sentimental. A half-finished piece can be framed, stored in an archival box with cedar, or displayed as-is. Preservation is a legitimate choice, not a failure.
Donate the yarn to a local knitting guild, a school fiber program, or a charity that accepts natural-fiber donations. Call ahead, many organizations have specific fiber requirements.
Watch OutNever frog a project you're not sure about. Once the stitches are pulled, the fabric is gone. If you're on the fence, put it back in the bin for a week and revisit. The project will still be there.
Weaving in Ends Knitting Techniques for a Clean Finish
Weaving in ends separates a homemade look from a professional one. The technique matters as much as the tension.
For stockinette, thread the tail onto a tapestry needle and duplicate-stitch it through the back of several stitches, following the path of the knitted V's. For ribbing, weave up one column of knit stitches and down the next purl column. For colorwork, weave each color into its own matching stitches so the ends disappear. Leave a two-inch tail, then trim. Never knot the ends; knots work loose with wear and create bumps. Weaving too tightly pulls the fabric and leaves a dimple visible from the right side.
How to Block Knitting Projects for a Professional Look
Blocking is washing and shaping a finished piece so the stitches settle evenly and the garment holds its intended dimensions. Skipping it leaves lace flat and sweaters misshapen.
Wet blocking works for most natural fibers: soak the piece in cool water with a wool wash, press out excess water in a towel, then pin it to the finished measurements on a blocking mat. Steam blocking suits wools that need less reshaping. Always check the yarn label first. For mittens and sweaters, blocking boards hold the shape while the piece dries.
Watch OutNever wring or twist a wet wool garment to remove water (woolmark.com). The agitation causes felting, and the piece will shrink permanently. Press the water out flat inside a towel instead.
Knitting Finishing Tools and Accessories That Help
The right tools turn finishing from a chore into a pleasure. A tapestry needle, blocking mats, rustproof pins, and a crochet hook for dropped stitches cover the basics.
For shaping, Brae & Heather's handcrafted mitten boards hold mittens to their intended size while they dry, and the jumper board does the same for full garments, inspired by the classic Shetland design. Both are made in the United States by artisan woodworkers. A project bag keeps the WIP organized so the working yarn, pattern, and needles stay together, and a bottle organizer offers a stylish home for knitting needles and small notions.
Mitten Boards – Handcrafted in the USA by Brae & Heather
Key TakeawayFinishing tools don't make the work faster. They make the result better, and better results are what motivate knitters to finish the next project instead of abandoning it.
Finding Help and Decluttering Your Craft Stash
Decluttering a craft stash is the final step in clearing the backlog. Sort supplies into three piles: keep, donate, and reclaim. Yarn that no longer fits your projects can go to a local knitting guild, a school program, or a charity that accepts fiber donations.
For inherited or stalled projects that feel too heavy to finish alone, volunteer finishers and local knitting groups offer hands-on help. Many guilds run "finish it" sessions where members bring stalled work and complete it together. The social element matters as much as the technical help.
If a pattern's instructions caused the stall, choosing patterns with clear schematics, multiple sizes, and detailed finishing notes prevents the next abandonment. That's the standard Brae & Heather holds its pattern collection to, alongside the Shetland wool and textile tools that support it.
Frequently Asked Questions
How to finish off a knitted project?
To finish off a knitted project, bind off all stitches, then weave in loose ends using a tapestry needle. Block the piece to settle stitches and shape it. For garments, seam pieces together if needed. Use knitting finishing tools and accessories like mitten boards or jumper boards to dry items in their intended form. Always check your pattern for specific finishing instructions.
What are unfinished projects called?
Unfinished knitting projects are commonly called WIPs, which stands for works in progress. Knitters also refer to them as UFOs (unfinished objects) or stalled projects. These terms describe any piece that has been cast on but not yet completed, whether it is a few rows in or nearly done but waiting for finishing techniques like blocking or weaving in ends.
How do I decide whether to finish, frog, or repurpose an old knitting project?
Assess the project's condition: check for dropped stitches, yarn damage, and whether the stitch pattern still appeals to you. If the yarn is in good shape and you like the design, finish it. If the project no longer fits your style or has errors, frog it and repurpose the yarn. Consider sentimental value and time investment before deciding.
What tools are necessary for professional-looking knitting finishes?
Essential knitting finishing tools and accessories include a tapestry needle for weaving in ends, blocking mats and pins, a tape measure, and scissors. For garments, mitten boards or jumper boards help shape and dry items properly. A stitch holder or spare needle is useful for managing live stitches. These tools ensure clean, polished results.
The real challenge with unfinished knitting projects isn't the technique. It's the decision to pick one up again. Brae & Heather offers the patterns, Shetland wool, and finishing tools that make the last stretch worth it, from handcrafted mitten boards and jumper boards to a curated pattern library built for knitters who intend to finish what they start. Get started with Brae & Heather and turn that drawer of WIPs into finished, wearable work.




0 commentaire