Fair Isle floats are the strands of yarn carried across the back of stranded colorwork, and how you manage them decides whether your finished piece drapes well or fights back. This guide from Brae & Heather covers the techniques that keep floats even, loose, and invisible from the right side.
Here is the uncomfortable truth most tutorials skip: a colorwork pattern can be flawless and still produce a garment nobody wants to wear. The chart was right. The colors were right. The floats were too tight.
Floats affect three things at once:
Stretch, tight strands lock the fabric and stop it from opening over a head or hand
Drape, bulky, uneven strands add weight and stiffness
Durability, loose, snag-prone loops catch on rings, zippers, and chair arms
Get the strands right and colorwork becomes soft, elastic, and comfortable. Get them wrong and no amount of beautiful patterning saves the project.
Key TakeawayThe single most common reason colorwork garments sit unworn is tight floats, not poor color choices. Fix the strands and the fit improves immediately.
How to Hold Yarn for Colorwork Knitting
Holding yarn for colorwork knitting means keeping two strands active at once, one main color and one contrast color, without letting either go slack or tight. There are two established methods, and both work.
One hand, two strands (Continental style): Both yarns rest over the left index finger, separated by a finger width. The needle picks the color it needs. This method is fast once it clicks, and the strands stay close together, which helps control tension.
One strand per hand (English and Continental combined): The main color runs over the right index finger, the contrast color over the left. Each hand throws or picks its own color. Most knitters find this easier to learn because the yarns never tangle.
A third option suits some knitters: hold both yarns in one hand and drop the unused one between color changes. It is slower, but it works well on small projects.
Whatever the method, one rule holds. Keep the unused strand relaxed across the back. If it feels taut against your finger, it will pull the fabric.
How to Catch Floats in Stranded Colorwork
Catching a float means securing the carried yarn behind a stitch of the other color so the long strand cannot snag. The catch is invisible from the right side when worked correctly.
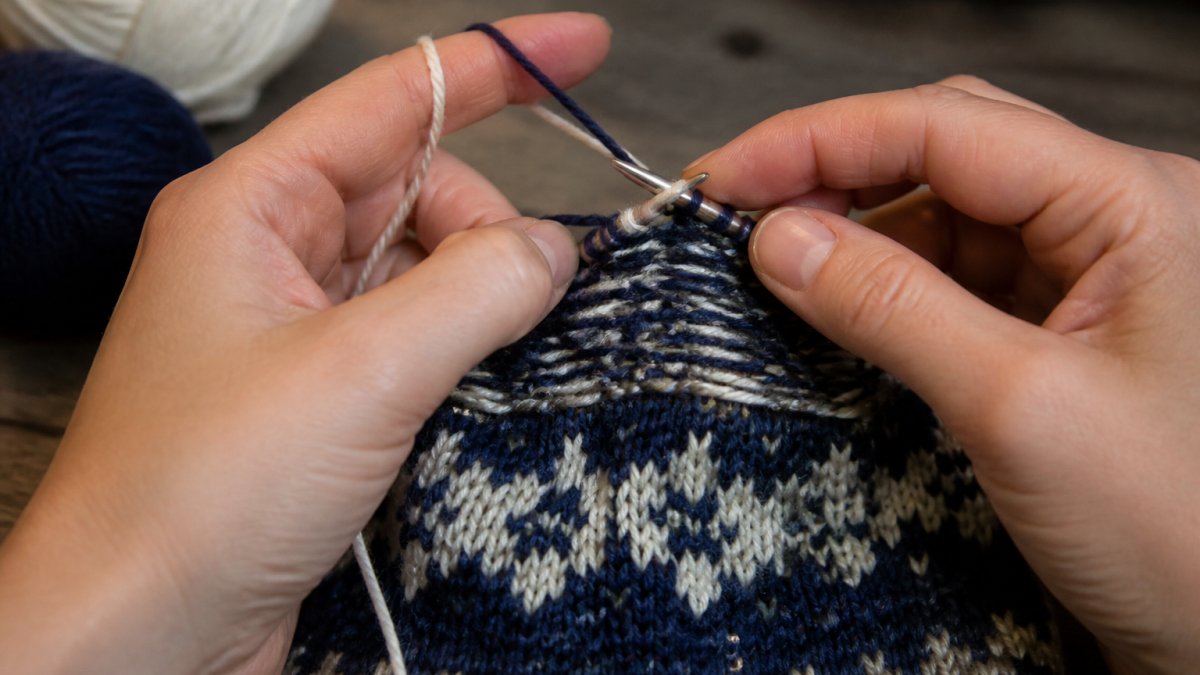
Close-up of a knitter's hands holding two contrasting yarns on circular needles, with a stranded colorwork hat in progress showing neat floats on the wrong side
Here is the standard method, step by step:
Work to the stitch where you want the catch.
Lay the carried yarn over the working yarn, forming a small loop.
Knit the next stitch with the working yarn, trapping the carried strand underneath.
Continue in pattern. The caught strand now sits locked behind that stitch.
The result is a float split into shorter, safer sections. Nothing shows on the front.
Watch OutCatching too often creates visible bumps and pulls the fabric in. If you can see a dot of the carried color on the right side, you caught too tightly or too frequently.
How Many Stitches Before Catching a Float?
Most tutorials give you a number and move on. The number is not the useful part. What matters is a rule you can adjust on the fly, because the right catch spacing changes with yarn thickness, stitch size, and how the finished piece will be used.
Here is a tested working rule you can apply to any project:
Catch a float when it would span more than about 1 inch (2.5 cm) of relaxed fabric, and never let a single strand run past about 1.5 inches (4 cm). Measure the float on the wrong side while the fabric is resting flat, not stretched. That physical measurement is more reliable than counting stitches, because five stitches of fingering weight and five stitches of bulky weight are very different lengths of exposed yarn.
To translate that into stitch counts for your gauge:
Fingering weight at 8 stitches per inch: 1 inch is about 8 stitches, so catch every 6 to 8 stitches.
Sport weight at 6 stitches per inch: catch every 5 to 6 stitches.
Worsted weight at 5 stitches per inch: catch every 4 to 5 stitches.
Bulky weight at 3.5 stitches per inch: catch every 3 to 4 stitches.
Then adjust for the project:
Situation
Catch Every
Why
Fingering weight, garment body
6-8 stitches
Fine yarn, low snag risk, drape matters
Sport or DK weight, sweater
5-6 stitches
Balanced snag protection and stretch
Worsted weight hat or mitten
3-4 stitches
Heavy handling, thicker strands
Any yarn, child's garment
3-4 stitches
Small fingers catch loops easily
Any yarn, cuff or neckband
3-4 stitches
Ribbing must stretch; long floats lock it
Decorative or non-worn piece
8+ stitches
Snagging is not a concern
Two adjustments override the table:
Ribbing and edges. Anywhere the fabric must stretch, catch sooner. A float that spans 6 stitches in stockinette may need catching every 3 or 4 in a 2x2 rib, because the rib has to open wide.
Highly variegated or slippery yarns. Slippery fibers like silk and alpaca can let a caught strand work loose over time. Catch one stitch sooner than the table suggests and check the back after blocking.
Key TakeawayMeasure the float, not just the stitch count. A strand longer than about 1.5 inches (4 cm) on relaxed fabric is the real snag risk, regardless of how many stitches it crosses.
How to Prevent Tight Floats in Knitting
Tight floats come from one habit: pulling the carried yarn snug after each color change. The fix is to spread the stitches apart before you work the next stitch.
Try this check. After a run of one color, stretch the stitches on the right needle apart with your thumb until the float lies flat and relaxed. Then work the next stitch. The strand settles at the right length instead of choking the fabric.
Turn the work inside out and knit with the floats on the outside of the tube
Work on circular needles slightly smaller than the pattern calls for in the round
Block a swatch before committing to a full garment
Keep the unused yarn resting on the finger, never gripped
Pro TipKnit a small practice swatch, block it, and stretch it over your hand. If the fabric will not open, the floats are too tight. This five-minute test catches the problem before you commit to a sweater.
Managing Long Floats Without Bulk or Snags
Not every long float needs catching. Sometimes the better move is a different technique entirely.
Ladder back or duplicate stitch. Work the motif in the main color, then add the contrast color afterward with duplicate stitch. This avoids long strands completely on isolated motifs.
Weaving as you go. Instead of a single catch, weave the carried yarn behind every second or third stitch across the run. The result is a soft, flexible back with no single long strand.
Intarsia for large blocks. When a color section spans many stitches, stranded work is the wrong tool. Intarsia uses separate yarn lengths per block and leaves no floats at all.
Each method trades speed for a specific benefit. Duplicate stitch is slow but tidy. Weaving is fast but adds a little bulk. Intarsia handles big blocks but needs more yarn management.
Uneven floats almost always trace back to one of four causes: inconsistent tension between the two colors, catches that are too tight, floats that are too short for the fabric to stretch, or floats that are too long and snag. The trick is diagnosing which one you have before you rip back.
Work through this sequence on a swatch or on the live fabric:
Step 1: Stretch test. Lay the fabric flat and pull it gently in both directions. If the front puckers and will not lie flat, the floats are too short. If it opens easily but the back looks lumpy, the catches are too tight. If it opens fine and the back is even, move to Step 2.
Step 2: Snag test. Run a fingernail or a blunt needle tip across the wrong side. Any strand that lifts more than about 1/4 inch (6 mm) is a snag risk and needs a catch or a shorter span.
Step 3: Show-through test. Hold the fabric up to a window. Dots of the contrast color on the right side mean you caught too tightly or too often. Alternate catch positions (see below) to spread the distortion.
Step 4: Tension test. Compare the two colors on the front. If one column of stitches looks tighter than the other, one strand is being pulled harder. The fix is to keep the unused yarn resting on the finger, never gripped, and to spread the stitches before each color change.
Fixing visible catch blips. A caught float can leave a faint dot on the right side. The fix is to alternate where you catch. Instead of catching at the same stitch in every run, stagger the catch one or two stitches earlier or later on each successive row. The dots no longer line up, and the eye reads the surface as even.
Circular versus flat knitting. In the round, tension tends to drift at the join between rounds, so check the first and last few stitches of each round. When you change needles, the float between the last stitch on the old needle and the first stitch on the new one can pull tight; give it a little slack before you work the first stitch. In flat knitting, watch the edges, where the carried yarn turns and can pull the selvedge inward.
When the finished piece still snags. Turn the garment inside out and gently stretch each long float over a needle tip to even it out, then block. Blocking settles the fibers and redistributes tension. If a single float is still too long, you can secure it with a few duplicate stitches in a matching color on the wrong side.
Pro TipKnit a 6-inch practice swatch in your chosen yarn, block it, and run the four tests above before you commit to a garment. The swatch tells you whether your catch spacing and tension are right for that specific yarn.
Frequently Asked Questions
How many stitches should you knit before catching a float?
Most knitters catch a float every three to five stitches, but the right number depends on your yarn weight and project. For fine Shetland wool, catching every four stitches keeps floats short enough to avoid snagging. For worsted weight, every three stitches works well. The key is consistency: pick a spacing and repeat it across the round so your fabric stays even. Test on a swatch first and check that the floats lie flat without pulling.
How do you catch a float without creating a visible color blip?
Catch the float on the wrong side by laying the carried yarn over your working needle before knitting the next stitch, then knit that stitch with the contrast color as usual. The carried strand gets trapped behind the new stitch and stays hidden. Keep the catch loose, and avoid catching on the same stitch column every round or you will see a faint diagonal line. Alternate your catch points by one or two stitches each round to spread the tension.
How do you keep yarn floats from pulling the fabric tight?
Spread your stitches apart on the right needle before you carry the yarn across, then lay the float loosely over your finger. After every few stitches, stretch the knitting sideways to release excess tension. Many knitters go up one needle size for the colorwork section. If the fabric puckers, rip back and re-knit with a looser carry. Blocking helps, but it cannot fix floats that were knit too tight.
How should you hold the yarn when knitting Fair Isle colorwork?
You can hold both yarns in one hand, one over the index finger and one over the middle finger, or use two hands with one yarn in each. Two-handed knitting, often called English and Continental combined, keeps the strands separate and reduces tangling. Whichever method you choose, keep the main color on the bottom and the contrast color on top so the dominant color sits forward. Practice on a small swatch until the tension feels natural.
Good colorwork asks for patience with the strands, not just the chart. Brae & Heather designs patterns for knitters who want to build real technique, with clear instructions and premium Shetland wool to match. Explore the collection to find your next colorwork project and put these float techniques to work.



0 commentaire