
Best Ways to Use Stitch Markers: A Knitter's Guide
Publié le Sep 21, 2026
By Editorial Team
Économisez 25 % sur les patrons et accessoires de tricot, aucun code requis

Last Updated: September 20, 2026
Stitch markers are small tools that hold your place in knitting and crochet work. They slip onto your needle or loop to mark important spots in your project. When you use stitch markers, think of them as bookmarks for your stitches.
Knitters use stitch markers to track pattern repeats, mark the beginning of rounds, and identify the right side of work. A simple marker prevents mistakes that can waste hours of work.
The right stitch marker makes the difference between a smooth project and a frustrating one. Brae & Heather offers stitch marker sets that combine practical function with beautiful design, making it easier to stay organized while you craft.

Insert the marker onto your needle right after you complete a stitch, positioning it between two stitches. The marker should sit flat against your needle without twisting or binding your yarn.
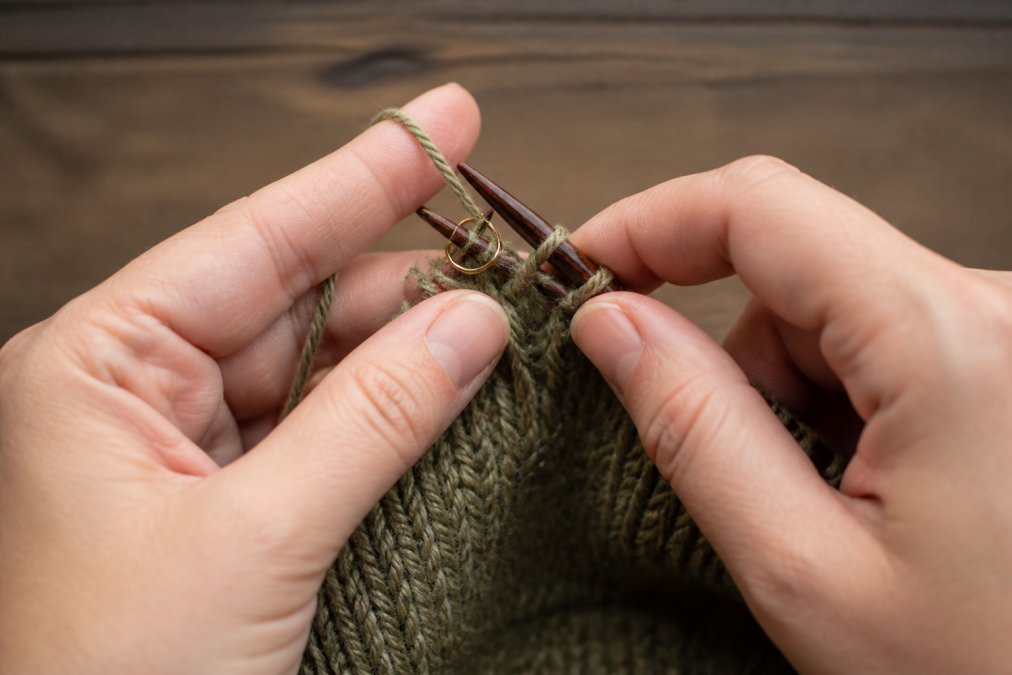
Ring markers slide directly onto the needle; clasp markers require opening the clasp, positioning it, and closing it gently. Both should move freely without catching fibers.
Slip the marker onto your needle after your first stitch in the round. As you work, slip the marker from the left needle to the right needle at the beginning of each new round. This keeps your round start visible and prevents accidentally working extra rows.
Place a distinctive marker on the right side of your work at the beginning of your project to remind you which side is facing you. This is especially important for Fair Isle and other colorwork, where it maintains consistent tension and stitch placement.
Place markers at the start and end of each pattern repeat. If your pattern repeats every 12 stitches, place a marker after every 12th stitch. This lets you glance at your work and know instantly which part of the pattern you're working on.
Place a marker where the color changes, using different colored markers for different sections if possible. This visual reference keeps you from accidentally mixing colors and makes colorwork less stressful.
Place a marker at the start of your lace pattern repeat rows. If your pattern repeats every 6 rows, mark the beginning of rows 1, 7, 13, and so on. Markers serve as checkpoints that confirm you're on the right row and working the correct stitches.
Locking stitch markers have a clasp mechanism that prevents them from sliding off your needle. Open the clasp gently, slip the marker onto your needle or through a stitch loop, and close it firmly without damaging your yarn. They work well for marking individual stitches within a row, such as for cable crosses or decreases.
The Sheep Stitch Marker Set and Whiskey Stitch Marker Set from Brae & Heather both include locking clasp markers. These markers slide smoothly onto needles and stay securely in place without harming your yarn.

Place markers on both sides of your cable section to frame it and show where cable stitches sit. Mark the beginning of each cable row so you know when to cross your stitches, preventing the common mistake of crossing cables at the wrong row.
| Marker Type | Best Use | Placement |
|---|---|---|
| Ring marker | Pattern repeats, round starts | Onto needle between stitches |
| Locking marker | Individual stitches, cable tracking | Through stitch loop |
| Clasp marker | Right side marking, section breaks | Onto needle with clasp closed |
Marker problems are common, but most are preventable or easily fixed once you understand what went wrong. Knowing how to diagnose and recover from marker mishaps keeps your project moving forward.
How to prevent it: Check that your marker sits snugly on your needle without forcing it. If your marker is too large for your needle diameter, switch to a smaller size. Position ring markers on the thicker part of tapered needles.
If it happens: Stop immediately and count back to find where the marker should have been.
How to prevent it: Develop a rhythm of slipping markers from left needle to right needle as you work. Use distinctive markers (different colors or with charms) so they stand out visually on your needle.
Douglas Modern Tartan Stitch Marker Set →
How to prevent it: Keep your working yarn away from your markers as you knit. Close locking marker clasps gently but firmly. Position the marker on the needle shaft, not in the gap between stitches where yarn can snag.
How to prevent it: Count carefully when placing markers initially. For pattern repeats, count from your cast-on edge or the previous marker to confirm you're at the right stitch.
How to prevent it: Use smooth, high-quality markers with rounded edges. For delicate lace yarn, use plastic ring markers rather than metal.
The right marker depends on three factors: your needle size, your yarn weight, and your project type. Matching these elements ensures your markers stay in place, don't damage your yarn, and make your work easier.
Your marker must fit comfortably on your needle without sliding or binding. Test your marker before starting, it should require a gentle push to move along the needle but not force.
Lace and fingering weight: Use plastic ring markers in the 8-10 mm range. Plastic is smooth and won't snag fine fibers. Avoid metal markers, which can leave marks.
Different projects benefit from different marker styles.
Ring markers are best for:
Ring markers slide easily along your needle and don't catch yarn. They're lightweight and work well with delicate fibers.
Locking markers are best for:
Clasp markers are best for:
For projects with multiple pattern repeats or color sections, use visually distinct markers. Markers with different colors, charms, or shapes help you instantly identify which marker is which.
Plastic markers are lightweight, smooth, and won't damage delicate yarn. They're ideal for lace and fingering-weight projects. Plastic markers are also affordable and come in many colors. The downside is that plastic can become brittle over time if exposed to heat or sunlight.
Stitch markers serve as visual guides throughout your knitting project. Place them on your needles to mark the beginning of rounds, separate pattern repeats, and track your position in complex stitch patterns. They help prevent miscounting, especially in colorwork, cables, and lace. Ring markers slide onto needles between stitches, while clasp markers hook over the needle without disrupting your work. Many knitters use different colored markers to indicate different sections of their project.
Position stitch markers at the start and end of each pattern repeat across your row or round. As you work, the markers clearly show where each repeat begins and ends, making it easier to spot mistakes immediately. For complex patterns with multiple repeats, use different marker colors or styles to distinguish between different sections. When you complete a repeat, slip the marker from one needle to the next, maintaining the visual guide throughout your project. This technique is essential for Fair Isle, cables, and intricate lace.
Locking stitch markers (clasp markers) open and close, allowing you to secure them directly into a stitch without removing the stitch from your needle. Use them to mark specific stitches you need to return to later, such as for picking up stitches, shaping, or identifying a mistake several rows back. Open the clasp, slip it through the stitch loop, and close it firmly. They're especially useful for large projects where you need to track progress across many rows without moving the marker forward with each row.
Match your marker size to your needle diameter. Available in 10 mm, 12 mm, and 14 mm sizes, these accommodate a wide range of needle gauges. Markers that fit too loosely will slip off; markers that are too tight will distort your stitches. Check your needle size and choose accordingly to ensure smooth functionality.

0 commentaire